Hiển thị các bài đăng có nhãn applications. Hiển thị tất cả bài đăng

Thứ Bảy, 28 tháng 7, 2012

How to Organize Your iPhone Apps Using Movement

Source : Internet
These are instructions on how to organize your iPhone applications using Movement. You will need to jailbreak your iPhone to make use of this utility.


Step One
Download Movement from here and save it to your Desktop.

Step Two
Double click the Movement.zip file on your Desktop to extract the archive. Drag the Movement app into your Applications folder to install it.


Step Three
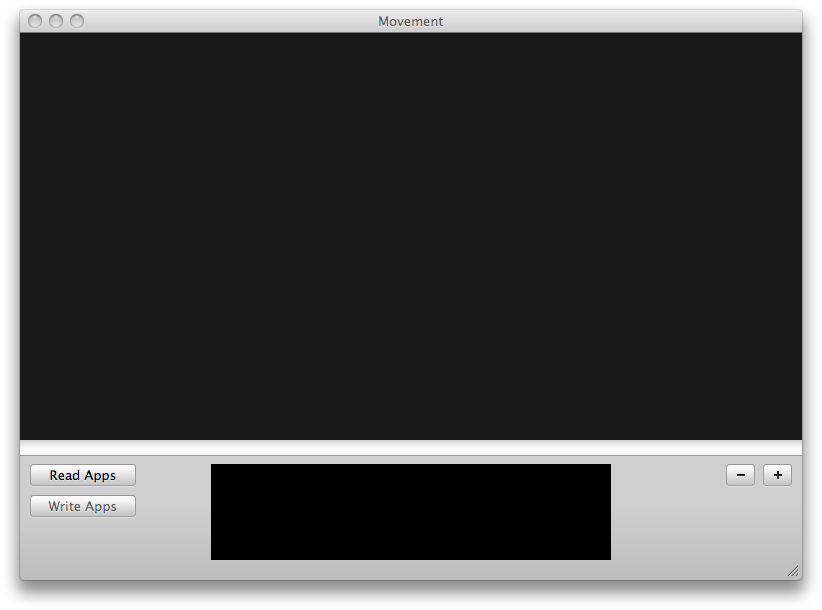
Launch the Movement utility by double clicking its icon in the Applications folder.


Step Four
Click OK to close the welcome popup.


Step Five
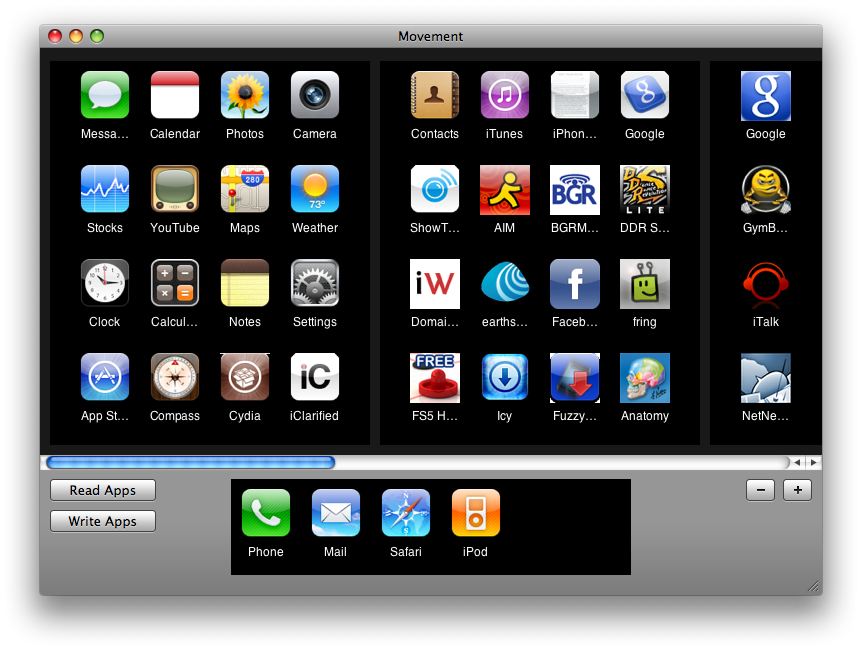
Click the Read Apps button to load your SpringBoard layout.


Step Six
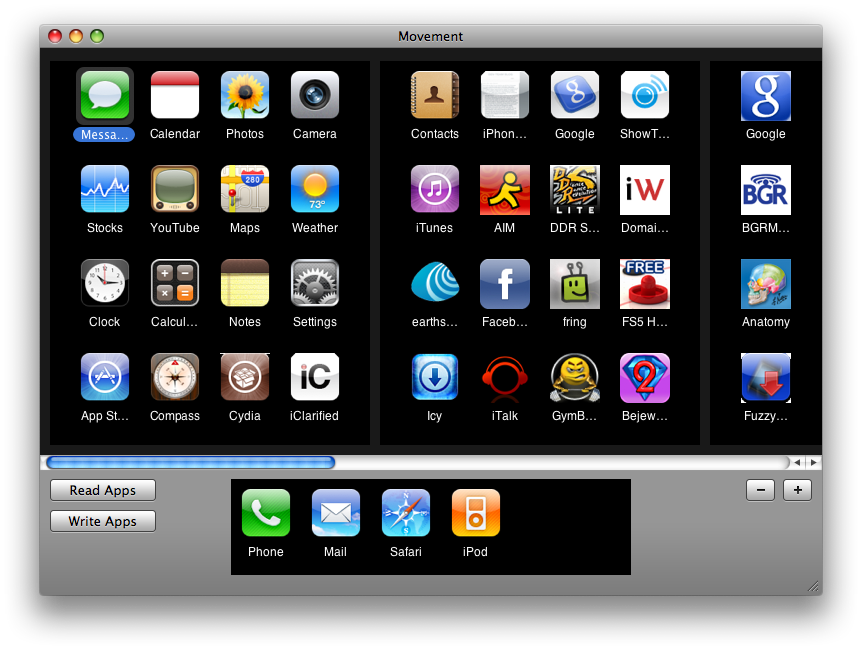
You can now drag the icons around to rearrange the layout to your preference.


Step Seven
When ready to apply your new layout click the Write Apps button.


Step Eight
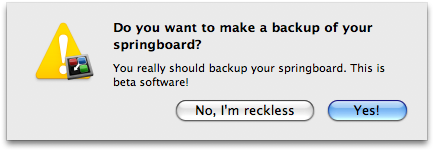
You will be prompted to save a backup of your SpringBoard. Click the Yes button.


Step Nine
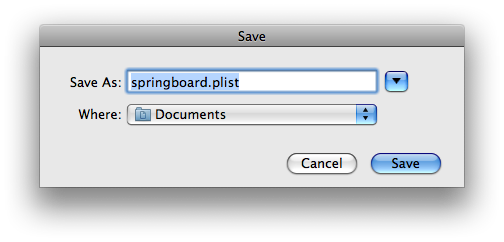
Select the location to save your backup the click the Save button.


Step Ten
You may now disconnect your iPhone and reboot to apply the new layout.


***THANKS: to Jeff Stieler for creating this utility.
Read More


Thứ Tư, 25 tháng 7, 2012

Những ứng dụng di động thịnh hành tại Việt Nam

Source : Internet


Việc lựa chọn phần mềm tùy thuộc vào nhu cầu của mỗi người và có thể rộ lên theo trào lưu, nhưng có những ứng dụng phổ biến trong một thời gian dài và gần như ai cũng biết đến khi sử dụng smartphone, tablet.

Các ứng dụng trong bài viết này được chia theo từng tiêu chí khác nhau và không đề cập đến app được cài sẵn trên nhiều dòng máy như Google Maps, YouTube...
Chat: Yahoo Messenger vẫn là công cụ chat được ưa chuộng ở Việt Nam, do đó đa số người dùng trong nước vẫn tiếp tục cài ứng dụng này lên điện thoại và máy tính bảng. Ngoài ra còn một số phần mềm cũng được yêu thích khác là IM+ và Skype.
Mạng xã hội: Ứng dụng Facebook là phần mềm được tải nhiều nhất trên tất cả các dòng điện thoại. Phiên bản dành cho Android rất được yêu thích ở Việt Nam, trong khi bản hoạt động trên iOS còn một số hạn chế nên người sử dụng thường chọn truy cập mạng xã hội này qua web (Safari, Chrome, Opera...) hơn.
Địa điểm: Trong số những ứng dụng hỗ trợ check-in địa điểm, Foursquare là vô địch và hình thành được một cộng đồng ở Việt Nam. Tuy nhiên, với sự phổ biến của Facebook, nhiều người bắt đầu có xu hướng sử dụng luôn tính năng check-in được tích hợp sẵn trong Facebook.
Game: Rất khó xác định người dùng dành nhiều thời gian cho trò chơi nào, nhưng có thể khẳng định đa số đã từng một lần thử chơi Angry Birds, Ninja Fruit vàCut the Rope. Đây cũng là những game hoạt động trên nhiều nền tảng khác nhau từ Android, iOS cho đến Amazon và Ovi (Nokia Services).
Ứng dụng ảnh: Nhìn vào mật độ chia sẻ ảnh "cổ điển" trên Facebook Việt, có thể nói Instagram không có đối thủ dù nó mới chỉ hoạt động trên iOS và Android (nhưng đây cũng là hai nền tảng di động phổ biến nhất tại Việt Nam).
Lưu trữ trực tuyến: Giới hạn về dung lượng trên các thiết bị di động khiến người ta quan tâm hơn đến các dịch vụ đám mây và kho lưu trực tuyến. Trong số này, Dropbox là dịch vụ được ưu ái nhất trên iOS, Android và BlackBerry với khả năng đồng bộ thời gian thực, miễn phí 2 GB...
Gọi điện và nhắn tin: Thay vì gọi và nhắn tin SMS qua sóng di động như thông thường, ngày càng nhiều người sử dụng tại Việt Nam tìm đến các phần mềm cho phép gọi điện, nhắn tin, gửi hình ảnh miễn phí giữa smartphone qua Internet với nhau, nổi tiếng nhất là Viber (ảnh) và Whatsapp.
Trình duyệt: Mỗi hệ điều hành có một trình duyệt riêng như Safari, Chrome... tuy nhiên phiên bản được nhiều người dùng trong nước chọn để cài đặt trên nhiều máy nhất là Opera Mini hoặc Opera Mobile của hãng phần mềm Na Uy. Ưu điểm của nó là hỗ trợ truy cập Facebook dễ dàng và khả năng nén dữ liệu để tiết kiệm chí phí khi duyệt web qua mạng 3G.
Châu An
Read More


Thứ Tư, 18 tháng 7, 2012

How to Block/Manage Outgoing iPhone Connections Using Firewall iP

Source : Internet

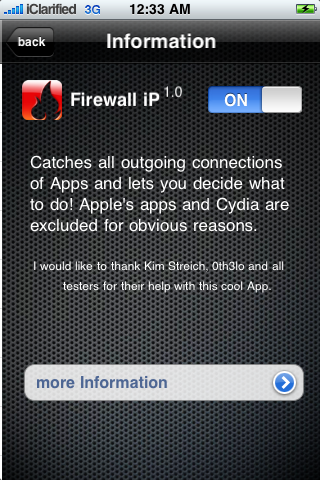
These are instructions on how to use Firewall iP to manage and block outgoing iPhone connections.


Firewall iP is a new application available from the Cydia Store. It will alert you when an iPhone app wants to establish a connection to a host and show you the hostname. Then you have the options to allow/deny the connection once/always or allow/deny all connections for the application.

Step One
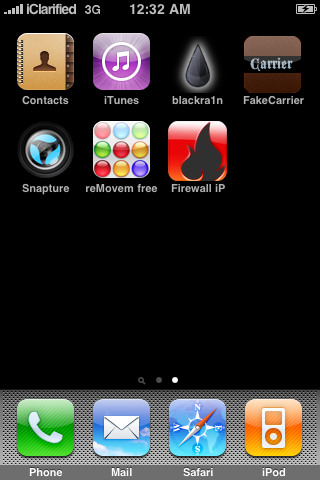
Download and install Firewall iP from the Cydia Store if you do not know how to do this you can find a tutorialhere. The app is available for $1.99.


Step Two
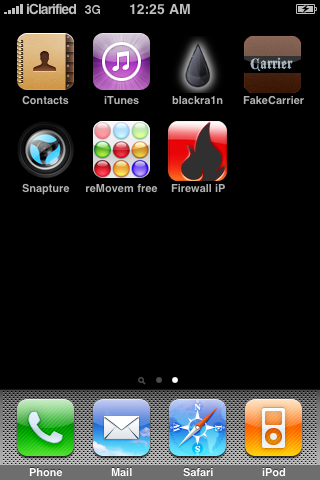
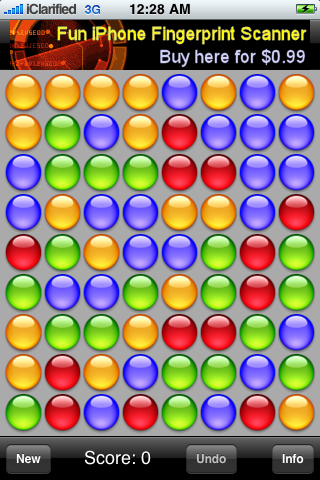
To begin to use Firewall iP we will need to monitor some outgoing traffic. Lets begin by opening a popular iPhone game reMovem (free).


As soon as the app launches, Firewall iP will monitor its network activity. When the app tries to make a connection to an external location Firewall iP will inform you of this.

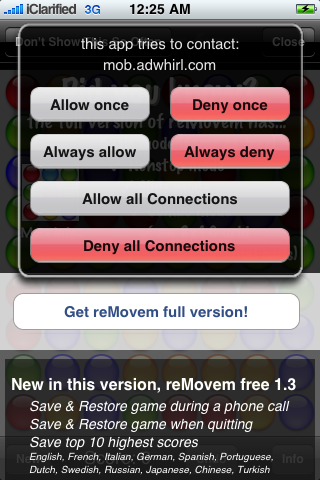
A popup will appear similar to "this app tries to contact: mob.adwhirl.com". You are now given the option to Allow once, Deny once, Always allow, Always deny, Allow all connections, and Deny all connections.


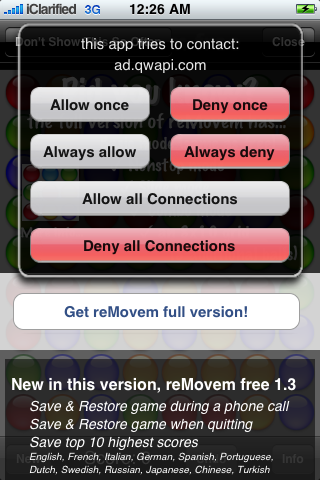
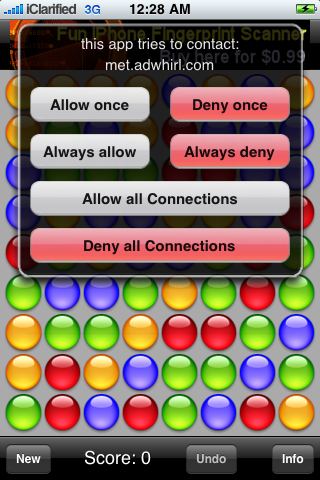
Since this is the free version of the reMovem app and the connection location indicates an adserver, we can assume that the app is trying to load an ad to display. Lets click the Deny once button to block the connection just this one time. The app may try to establish a connection multiple times and to contact different ad servers such as mm.admob.com, ad.qwapi.com, etc. Press the Deny once button till the prompts stop appearing. Notice the toolbar says reMovem free.


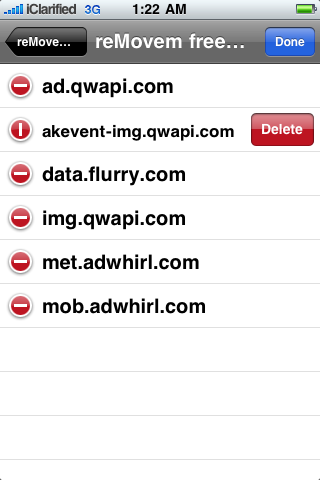
Now press the Home button then relaunch reMovem (free). This time lets press Always allow for mob.adwhirl.com, mm.admob.com, ad.qwapi.com, etc. Now when the app loads you will notice the toolbar has a nice little ad in place of the words reMovem


When using a free application you may get prompted again to confirm outgoing connections. If the application is from a trust worthy developer you can use the Allow all connections button to approve all outgoing connections for the application.

Remember developers who make ad supported applications depend on this advertising revenue. Please do not block the traffic which supports their work.

Step Two
Let us try to monitor some outgoing traffic of a paid application; for example, Snapture.

Launch the application from your Springboard. The app first tries to establish a connection to snapturelabs.com. This could be a valid connection which checks for updates or similar. Lets press Always allow for now.


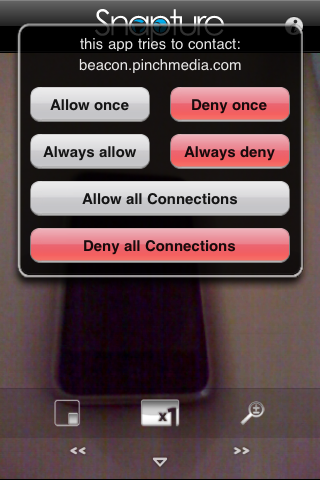
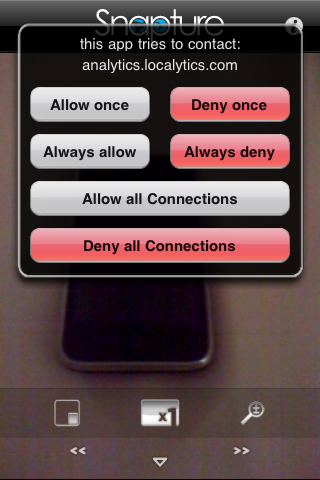
Following this connection attempt Snapture tries to connect to beacon.pinchmedia.com and analytics.localytics.com. These connections are likely to collect usage and user data. To prevent these you could press Always deny or if you want to prevent all outgoing connections you can press the Deny all connections button.


Step Three
By default Firewall iP is enabled after installed. To turn on and off the firewall simply press to launch Firewall iP from the Springboard then press the i at the top right of the screen. You will see a switch which can be used to turn on and off Firewall iP.


Step Four
You can also manage rules you have already set in place from the Firewall iP application.

The main screen displays a list of applications for which rules have been set. Press to select an application from this list.


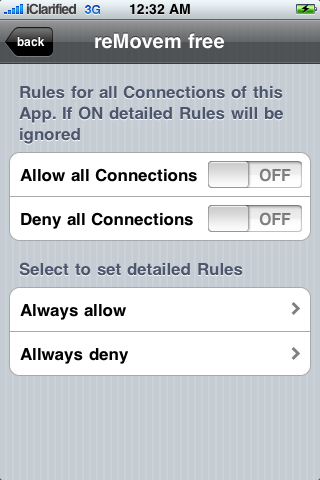
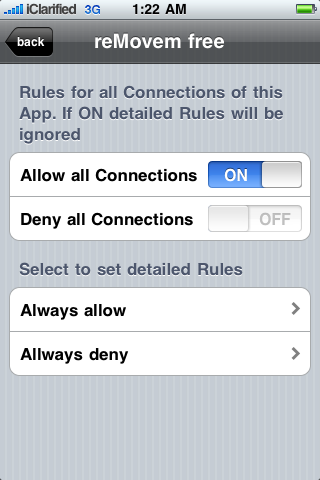
You will notice two switches. One switch will allow all connections for the app. The other will deny all connections for the app. There is also two buttons. One displays all the always allow rules. The other displays all the always deny rules.


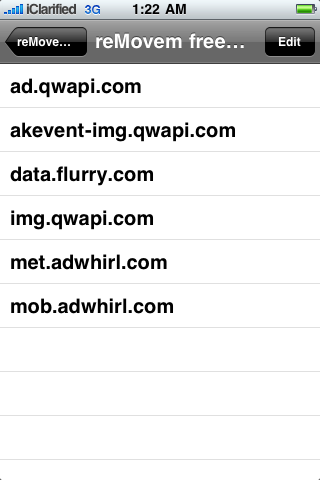
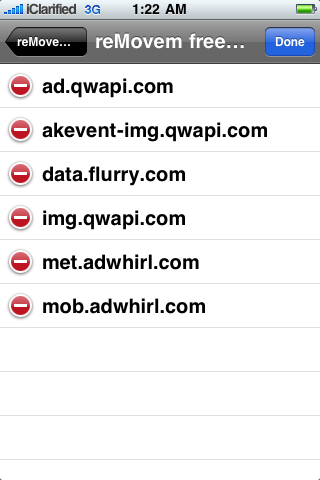
Press to select Always allow to view its list. To remove a rule from the list simply press the Edit button at the top right of the screen then press the delete icon to the left of the rule you would like to remove. To confirm the removal press the Delete button then press the Done button at the top right to exit edit mode.


To override the individual rules just switch on the Allow all connections or the Deny all connections toggle.


Step Five
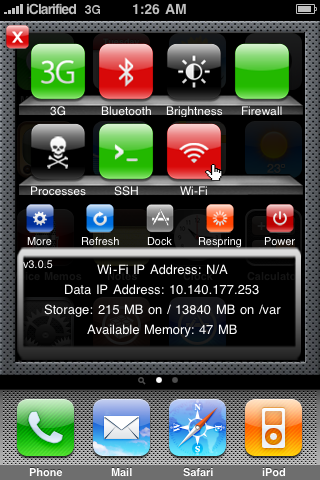
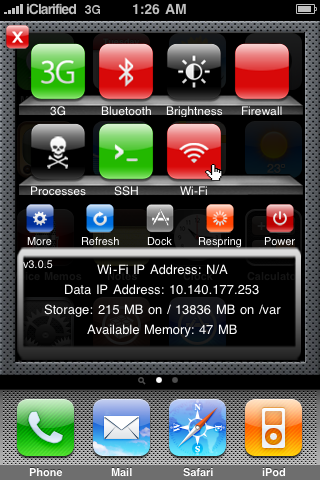
Firewall iP can also be easily enabled or disabled using a SBSettings toggle.


Read More


How to Customize Your iPhone Lockscreen Using LockInfo

Source : Internet

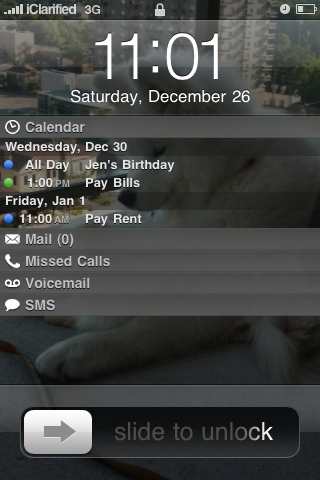
These are instructions on how to customize your iPhone Lockscreen to display your calendar, mail, calls, sms, weather, twitter, todo, and more using LockInfo.


Step One
Press to launch Cydia from your Springboard.
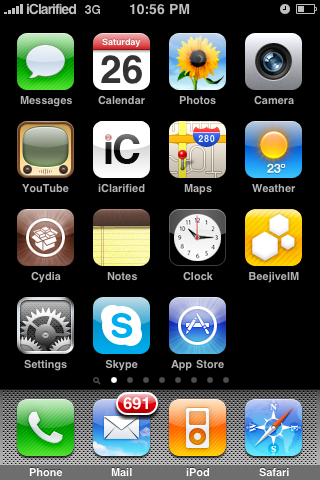

Step Two
Press to choose Sections from the tabs at the bottom of the screen.
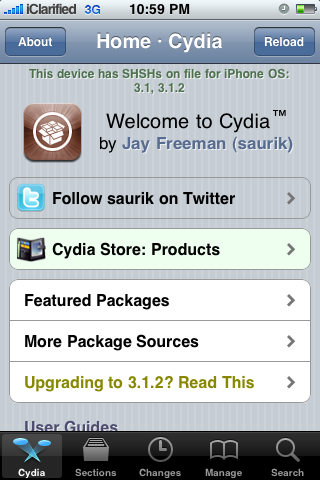

Step Three
Press to select Tweaks from the list of Sections.
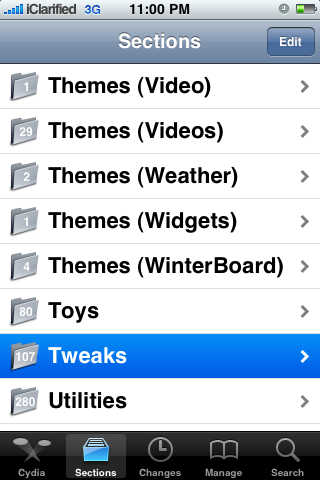

Step Four
Tap to choose LockInfo from the list of Packages.
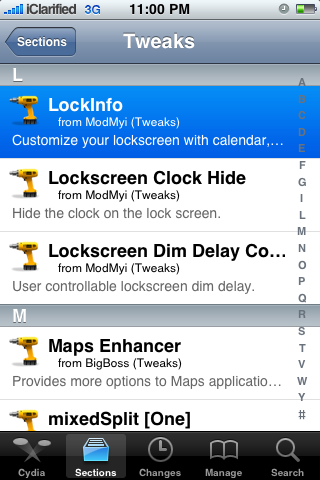

Step Five
Press the Install button at the top right of the screen.
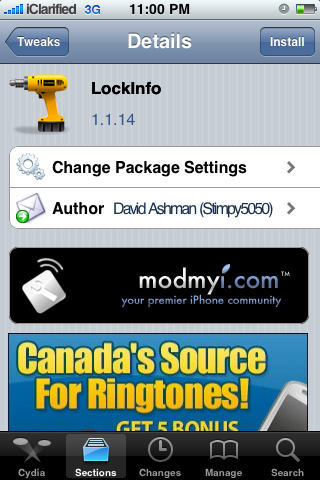

Step Six
Press the Confirm button at the top right to begin installation.
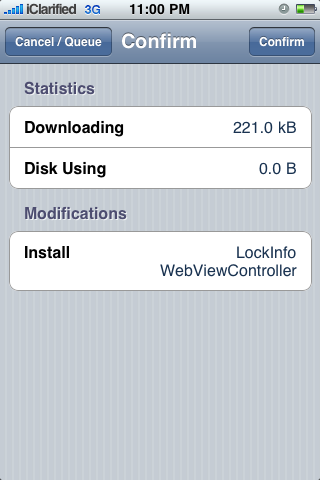

Step Seven
Once the installation has completed successfully press the large Respring Springboard button.
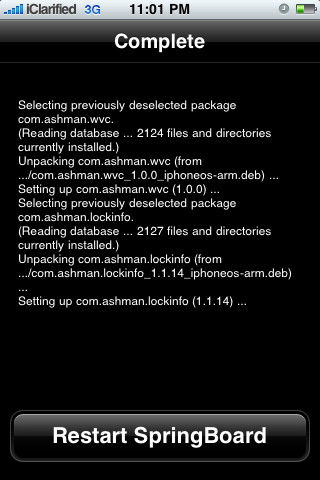

Step Eight
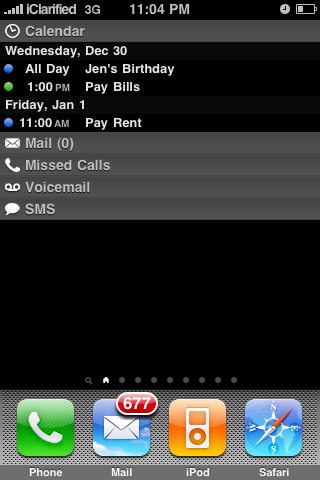
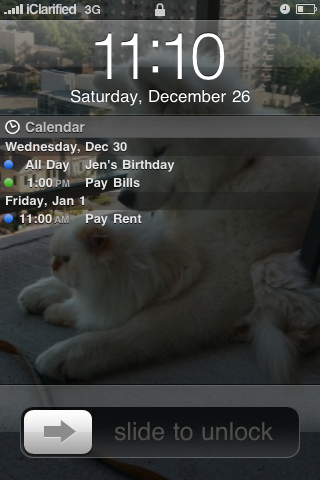
Notice that you now have some useful information on your Lockscreen! Lets try to customize it...
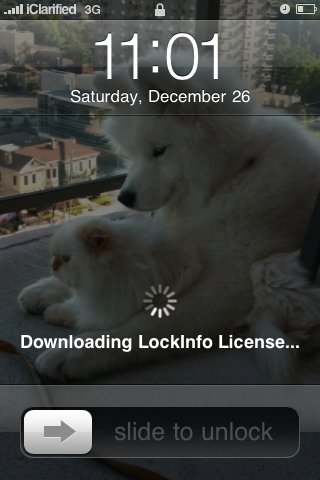

Step Nine
Press to select Settings from your Springboard.
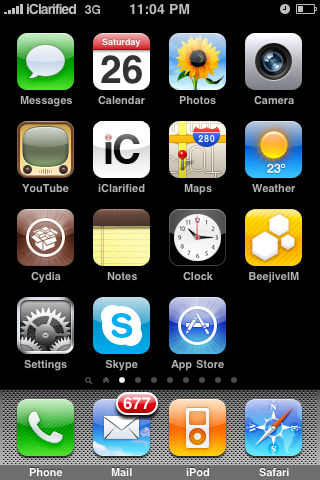

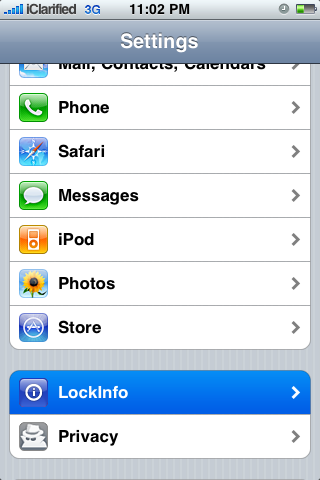
Step Ten
Scroll down and select LockInfo from the Settings Menu.

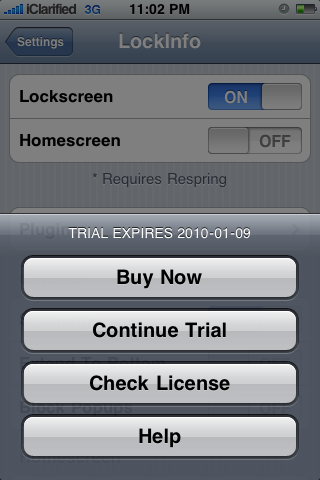
Step Eleven
If you haven't already purchased LockInfo you will be prompted to Buy Now or continue your trial. Press the appropriate button.

Step Twelve
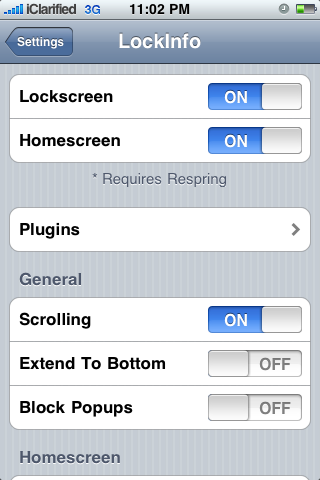
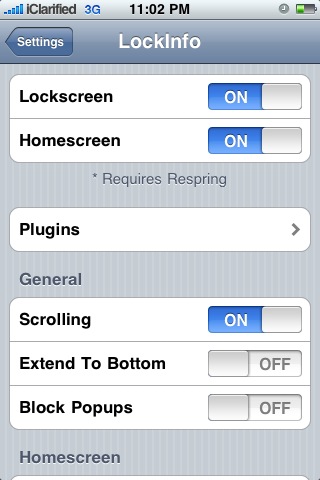
At the top of the LockInfo Settings Menu you will see two switches. One places LockInfo on your lockscreen. The other places LockInfo on your Homescreen by inserting a page before your first Springboard page.
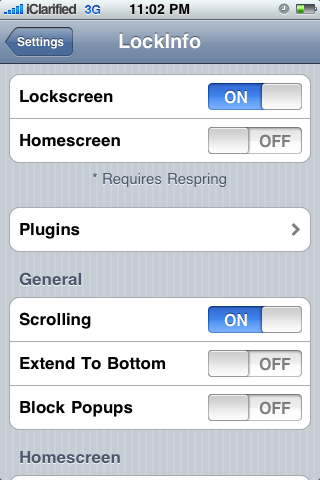

If you choose to add LockInfo to the homescreen then you must reboot your iPhone for the change to take effect.
Step Thirteen
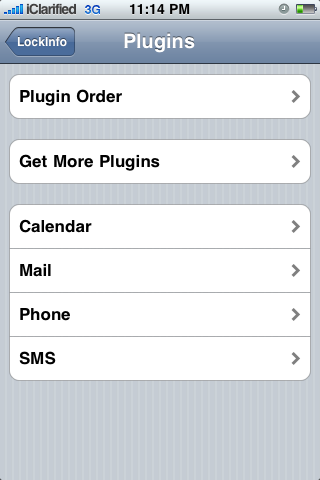
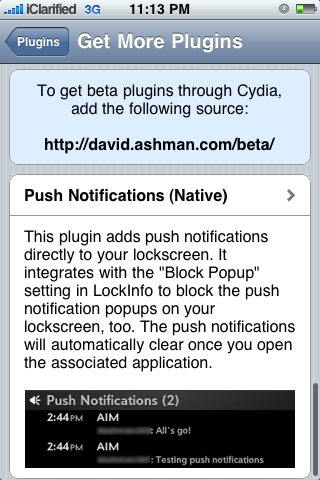
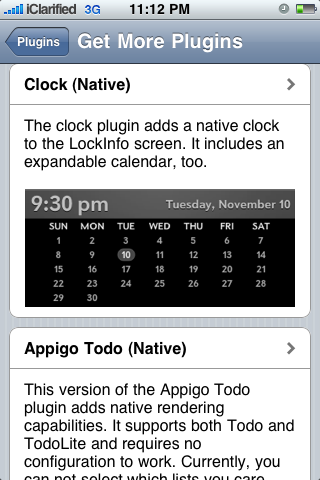
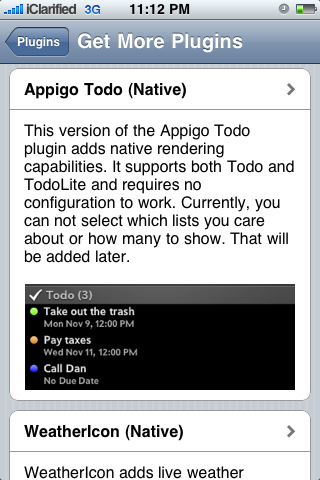
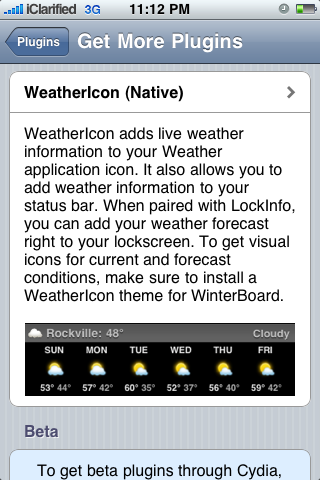
LockInfo comes with Calendar, Mail, Phone, and SMS plugins installed. You can also add Twitter, Clock, Appigo Todo, WeatherIcon, and Push Notifications (Beta).

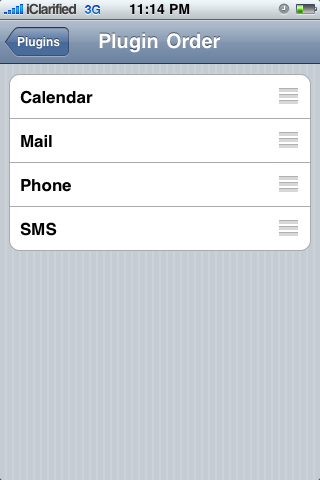
We will deal with adding another plugin below. For now press Plugins then press Plugin Order. Here you can drag to set the order your information appears in.
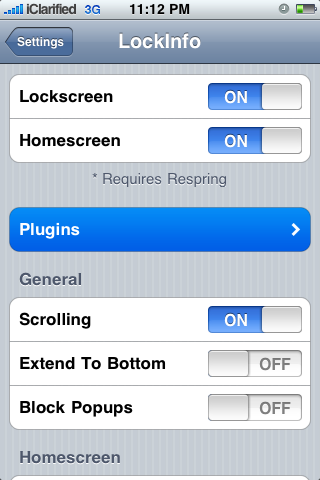

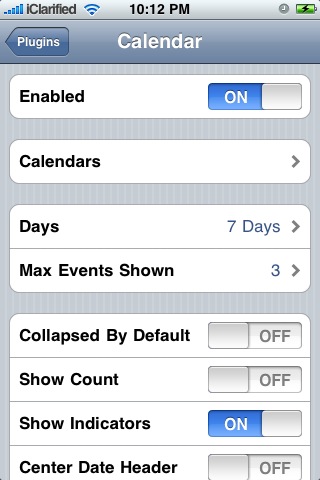
From the Plugins Setting screen you can also select a plugin to modify its individual settings. For example, if you select Calendar you can enabled or disable it, choose which Calendars appear, set the days, max events shown, and change the view options.

Step Fourteen
Back in the LockInfo main settings screen you can enable or disable scrolling, choose to extend info to bottom, and block popups.

Step Fifteen
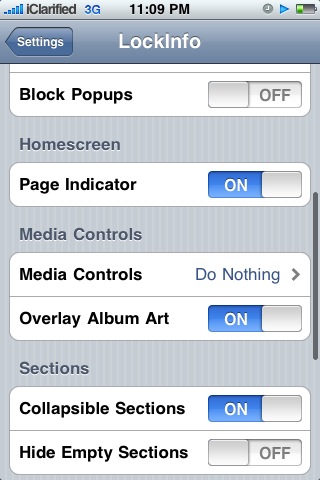
You can also choose to display a page indicator on the Homescreen.

Step Sixteen
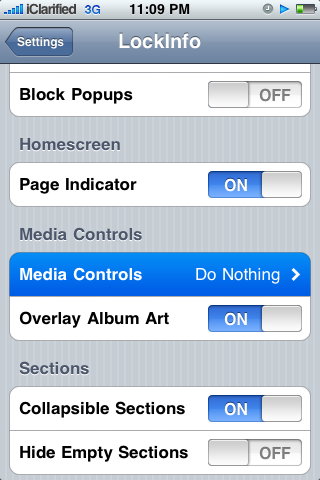
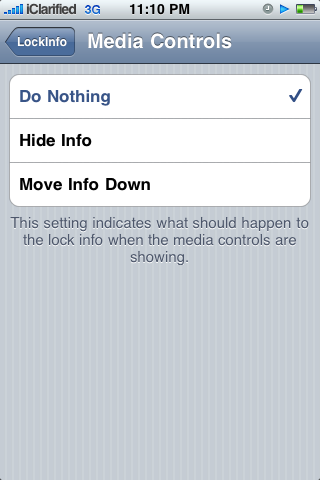
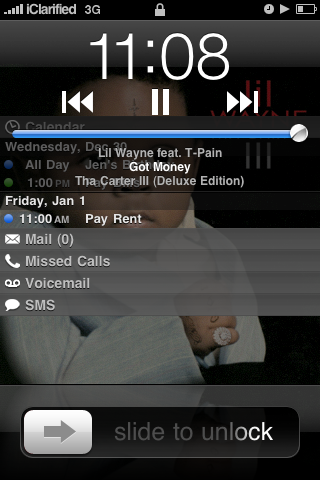
When playing music or video a popup controller normally appears on your lockscreen. When this occurs you can have LockInfo do nothing, hide the LockInfo or move the LockInfo down. You also have a choice to overlay the album art as the lockscreen background.
Step Seventeen
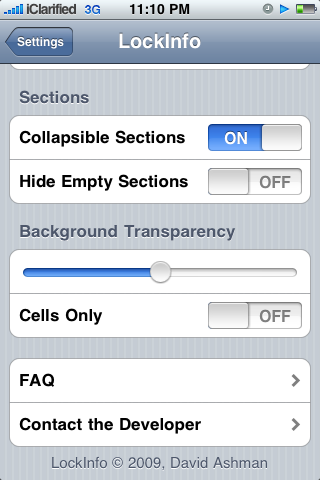
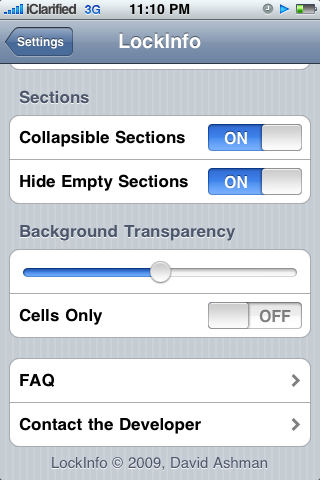
The LockInfo is divided into different sections for each plugin. You have the option to enable or disable collapsible sections as well as the option to hide empty sections.
Step Eighteen
Finally you can set the transparency of the LockInfo and choose to apply the transparency to cells only.


INSTALLING A LOCKINFO PLUGIN
To install a lockinfo plugin follow these steps:

Step One
Press to launch Settings from your iPhone Springboard.


Step Two
Press to select LockInfo from your Settings menu.


Step Three
Press to choose Plugins from the LockInfo Settings menu.


Step Four
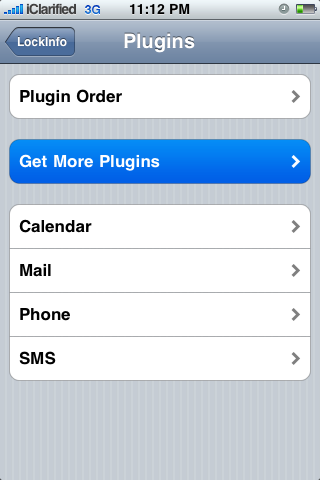
Press the Get More Plugins button from the Plugins Settings menu.

Step Five
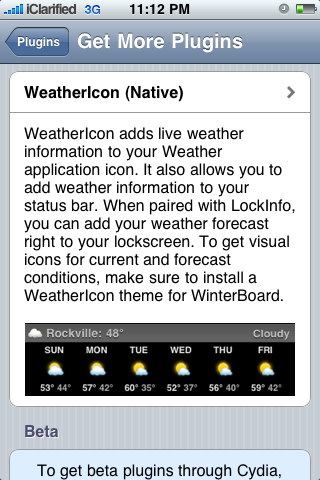
Press to select the plugin you would like to install from the list of available plugins. For this example we will choose WeatherIcon.

Step Six
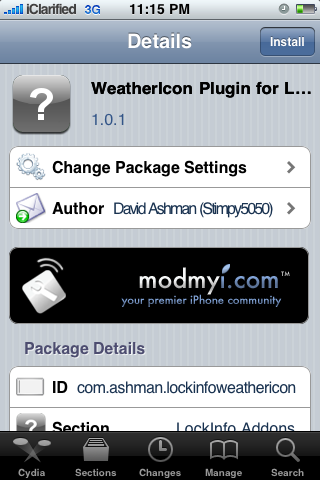
Cydia will automatically launch and open to the plugin package you just selected. Press the Install button at the top right of the screen.

Step Seven
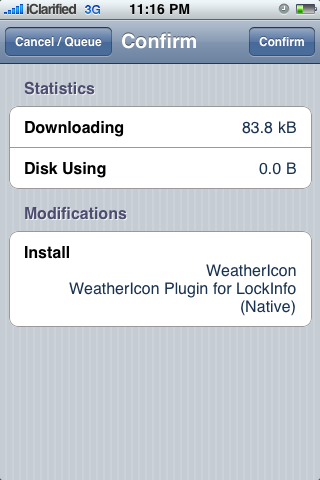
Press the Confirm button at the top right to begin installation.

Step Eight
Once the installation has completed successfully you will notice that LockInfo has an extra section to display the new information.
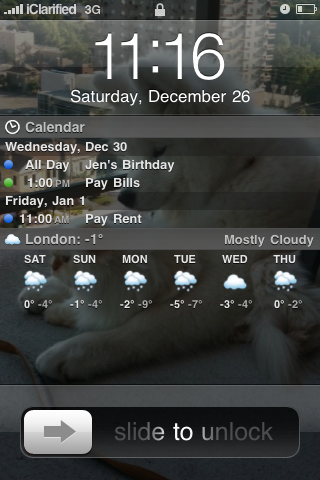

Step Nine
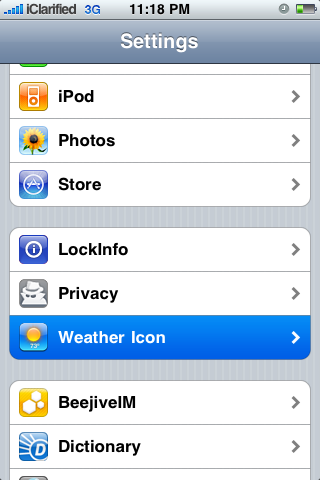
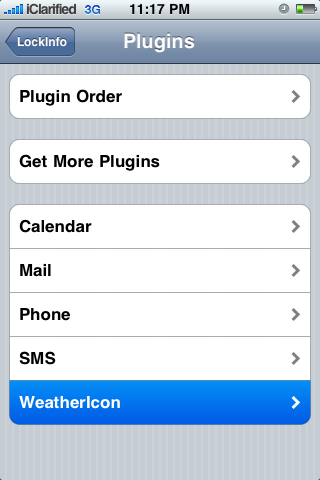
The newly installed plugin can be configured in two areas. First you can go into Settings:LockInfo:Plugins and you will find your newly installed plugin listed.


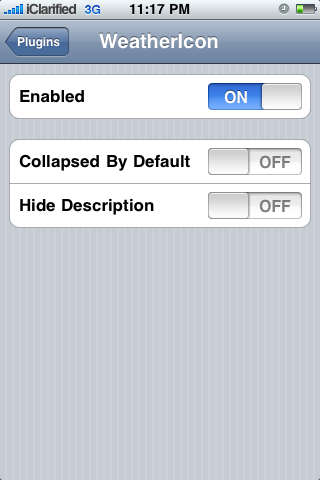
Press to select it. From here you can choose to enabled or disable the plugin as well as modify some basic settings such as collapsed by default and hide description.
Step Ten
To access the detailed settings for your plugin press Settings from the Springboard then select the plugin name from the Settings menu.
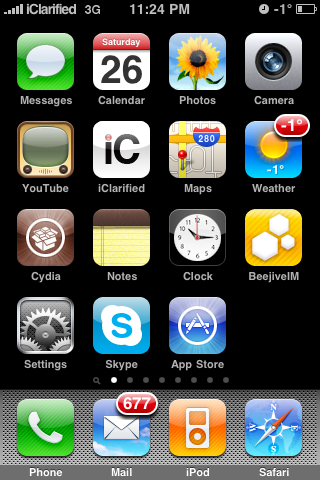

From this window you have the ability to modify advanced settings for the plugin. If you installed the WeatherIcon plugin like us you can modify the icon's settings, put the temperature on the status bar, change how often the weather is refreshed, show the wind chill temperature, use local time and even override the default location.
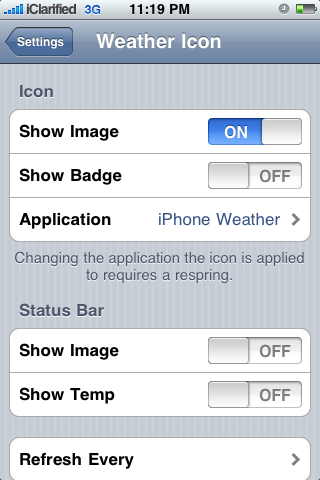
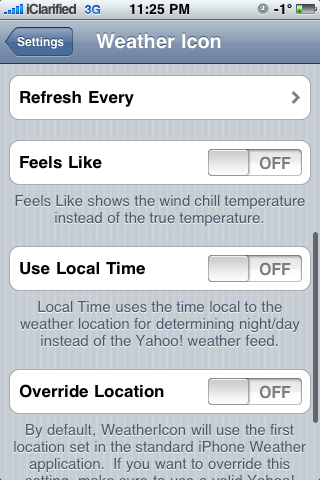
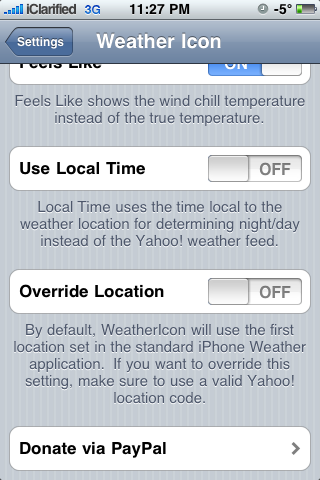
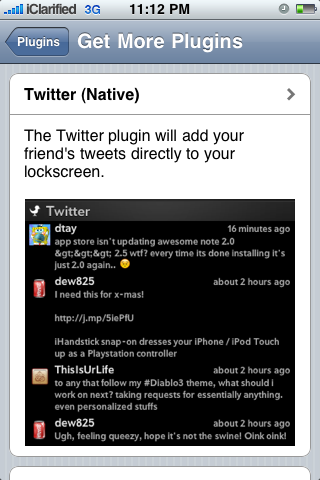
Of course the settings in this area will change depending on which plugin you have installed. Currently you can choose to install these additional plugins: Twitter, Clock, Appigo Todo, WeatherIcon, and Push Notifications (Beta).
Read More


Return to top of page
Powered By Blogger | Design by Genesis Awesome | Blogger Template by Lord HTML