Source : Internet
Before you can follow these instructions you must have a jailbroken iPhone and you must be on the 02.28.00 baseband(modem firmware). This means that you must be running the 2.2 firmware or have used PwnageTool(NOT QUICKPWN) to install 2.2.1 without upgrading the baseband.
To find your firmware and modem firmware(baseband) versions you can follow this tutorial. If you are not on baseband version 02.28.00 then you need to follow one of these tutorials before unlocking: Mac, Windows Watch the Video!
For your convenience this tutorial is available in video format also. Click the Watch It button to view the tutorial!
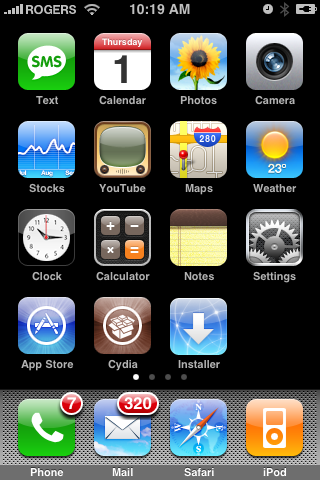
Step One
Press to launch Cydia Installer from your SpringBoard.
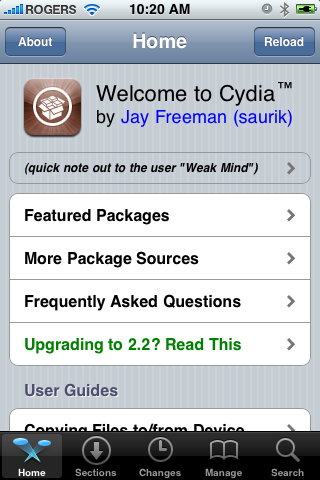
Step Two
Press to select the Manage tab at the bottom of the screen.
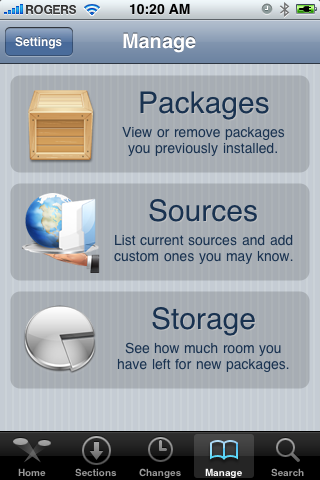
Step Three
Press to select the large Sources button
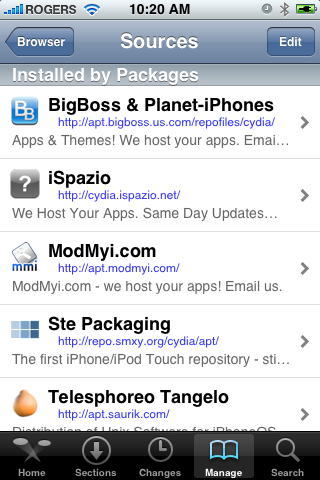
Step Four
Press the Edit button at the top right of the screen.
Step Five
Press the Add button at the top left of the screen.
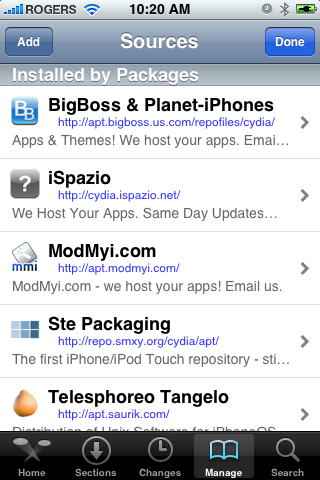
Step Six
Enter http://apt9.yellowsn0w.com/ as the source url and press the Add Source button.
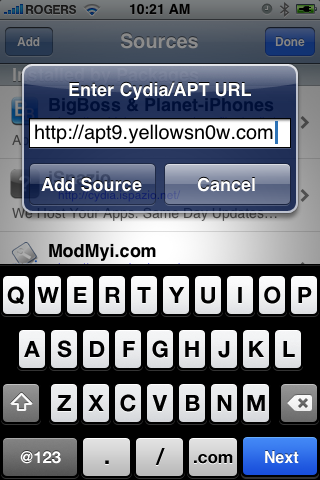
Step Seven
Once the source has been added press the large Return to Cydia button.
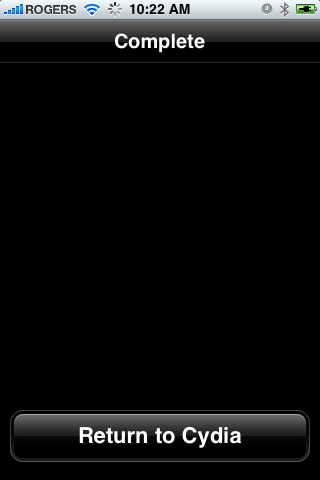
Step Eight
Press the Done button at the top right of the screen.
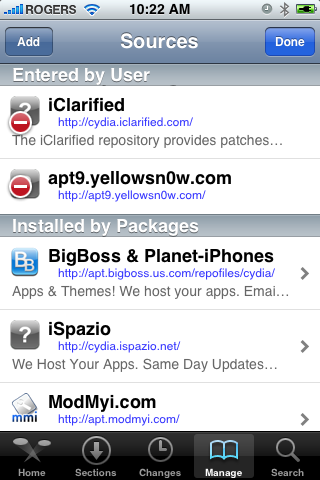
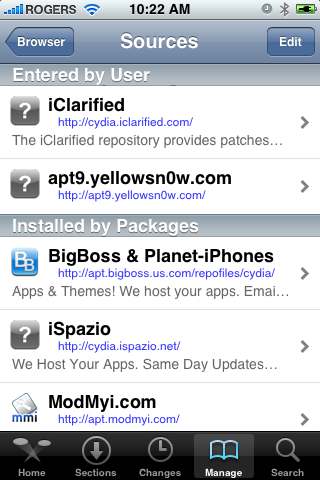
Step Nine
Press to select apt9.yellowsn0w.com from the list of user entered sources.
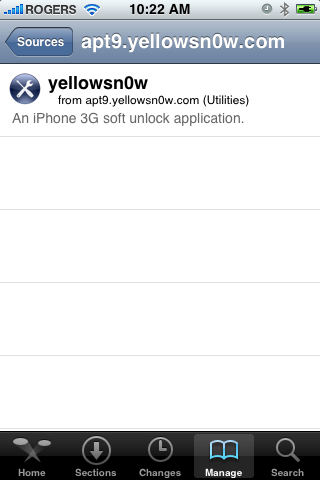
Step Ten
Press to select yellowsn0w from the list of packages
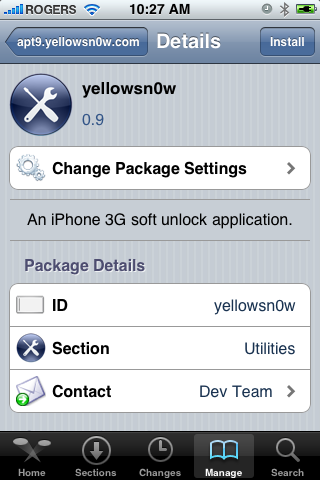
Step Eleven
Press the Install button at the top right of the screen.
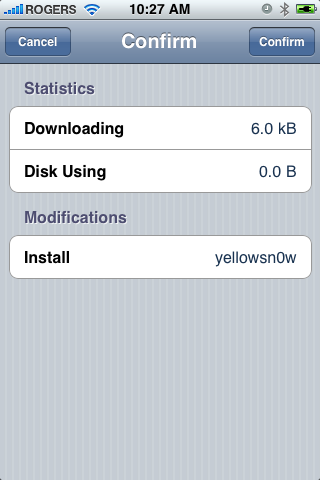
Step Twelve
Press the Confirm button at the top right of the screen.
Step Thirteen
After installation completes successfully press the large Return to Cydia button.
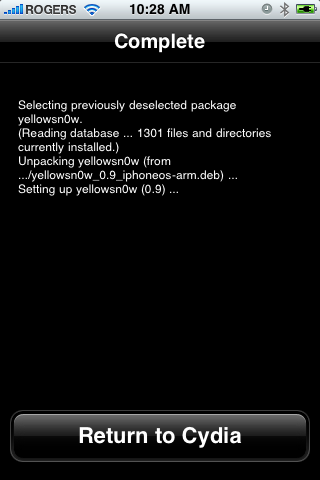
Step Fourteen
Now press the Home button then power off and power on the iPhone. You do this by holding down the power button for 3 seconds then moving the power slider that appears to the right. Press the power button again to turn on the phone.
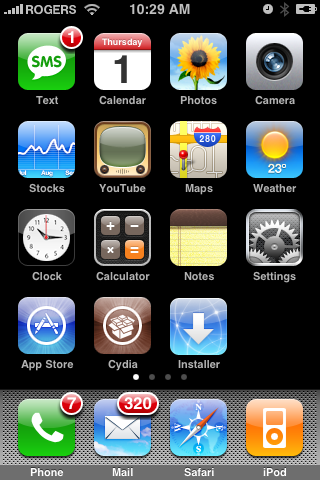

Step Fifteen
You should now be able to insert the SIM of your choice!
***HINTS: It seems that getting your iPhone to pick up your new carrier can be helped by turning off 3G and perhaps toggling the Airplane Mode switch on and off. If you are still having problems try removing and reinserting the SIM or booting with the new SIM already inside. Finally, you can also try to Reset Network Settings from the Settings:General:Reset Menu.
***IMPORTANT: For those having trouble. The yellowsn0w application can simply be uninstalled. If you have tried all the hints and suggestions and still have problems just use Cydia to remove the package and then reboot. You will then have service with your locked carrier as always.
***THANKS: A big thank you to all the members of the iPhone Dev-Team for all their hard work! It is much appreciated by all.
***UPDATES: The Dev-Team has made yellowsn0w 0.97 available. This version supports the 2.2.1 firmware using the 02.28 baseband.
Read More
These are instructions on how to software unlock the iPhone 3G for use with any GSM cellphone carrier.
Before you can follow these instructions you must have a jailbroken iPhone and you must be on the 02.28.00 baseband(modem firmware). This means that you must be running the 2.2 firmware or have used PwnageTool(NOT QUICKPWN) to install 2.2.1 without upgrading the baseband.
To find your firmware and modem firmware(baseband) versions you can follow this tutorial. If you are not on baseband version 02.28.00 then you need to follow one of these tutorials before unlocking: Mac, Windows
Watch the Video!For your convenience this tutorial is available in video format also. Click the Watch It button to view the tutorial!
Step One
Press to launch Cydia Installer from your SpringBoard.
Step Two
Press to select the Manage tab at the bottom of the screen.
Step Three
Press to select the large Sources button
Step Four
Press the Edit button at the top right of the screen.
Step Five
Press the Add button at the top left of the screen.
Step Six
Enter http://apt9.yellowsn0w.com/ as the source url and press the Add Source button.
Step Seven
Once the source has been added press the large Return to Cydia button.
Step Eight
Press the Done button at the top right of the screen.
Step Nine
Press to select apt9.yellowsn0w.com from the list of user entered sources.
Step Ten
Press to select yellowsn0w from the list of packages
Step Eleven
Press the Install button at the top right of the screen.
Step Twelve
Press the Confirm button at the top right of the screen.
Step Thirteen
After installation completes successfully press the large Return to Cydia button.
Step Fourteen
Now press the Home button then power off and power on the iPhone. You do this by holding down the power button for 3 seconds then moving the power slider that appears to the right. Press the power button again to turn on the phone.
Step Fifteen
You should now be able to insert the SIM of your choice!
***HINTS: It seems that getting your iPhone to pick up your new carrier can be helped by turning off 3G and perhaps toggling the Airplane Mode switch on and off. If you are still having problems try removing and reinserting the SIM or booting with the new SIM already inside. Finally, you can also try to Reset Network Settings from the Settings:General:Reset Menu.
***IMPORTANT: For those having trouble. The yellowsn0w application can simply be uninstalled. If you have tried all the hints and suggestions and still have problems just use Cydia to remove the package and then reboot. You will then have service with your locked carrier as always.
***THANKS: A big thank you to all the members of the iPhone Dev-Team for all their hard work! It is much appreciated by all.
***UPDATES: The Dev-Team has made yellowsn0w 0.97 available. This version supports the 2.2.1 firmware using the 02.28 baseband.




![[IMG]](http://img694.imageshack.us/img694/1590/49666083.jpg)
![[IMG]](http://img17.imageshack.us/img17/5113/89195131.jpg)