Hiển thị các bài đăng có nhãn Mac OS X. Hiển thị tất cả bài đăng

Thứ Sáu, 24 tháng 8, 2012

Apple ra Mac OS 10.8.2 cho lập trình viên hỗ trợ Facebook, iMessages

Source : Internet


Ngoài cập nhập cho người dùng phổ thông lên phiên bản 10.8.1, Apple còn giới thiệu phiên bản thử nghiệm với các tính năng quan trọng là Facebook và iMessages. 
mountain-lion-10-8-1-update-jpg-13457727
Các lỗi được sửa trong Mac OS 10.8.1. 
Những người dùng Mac OS sáng nay đã bắt đầu được thông báo về bản cập nhập mới. Nếu không nhận được thông báo, có thể truy cập vào Apple Menu chọn Software Update. Hầu hết các nâng cấp trong phiên bản mới đều chỉ ra từ các lỗi cụ thể như cổng ra Thunderbolt Display hoặc bị "treo" trong chương trình Migration Assistant. Ngoài ra còn có một sửa chữa nhỏ cho iMessages bị lỗi không gửi được cũng như cải thiện khả năng trao đổi, tương thích trong Mail. 
appl8-23-1345750331-png-1345772781-13457
Phiên bản 10.8.2 cho lập trình viên. 
Một điểm đáng chú ý khác là Apple cũng đồng thời ra mắt phiên bản 10.8.2 dành cho lập trình viên với nhiều tính năng được chờ đợi. Theo đó, hãng sẽ tập trung và một loạt các lĩnh vực xã hội cũng như các ứng dụng tiện lợi khác, bao gồm Facebook, Messages, Game Center, Note và cả trình duyệt web của công ty, Safari. 
"Quả táo" cũng khuyến cáo người dùng khi cài phiên bản dành cho lập trình viên nên xóa các dữ liệu hệ điều hành cũ hoặc cài trên một phân vùng mới để trải nghiệm tốt nhất. 
Minh Phương
Read More


Thứ Ba, 24 tháng 7, 2012

How to Enable Full 2880x1800 Resolution on Your Retina Display MacBook Pro

Source : Internet

These are instructions on how to set your Retina Display MacBook Pro to its full 2880x1800 resolution.


Step One
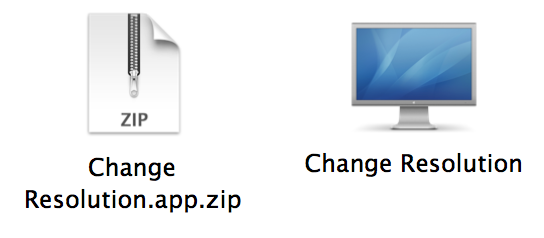
Download Change Resolution by doh123 to your desktop from here then double click the downloaded file to extract it.


Step Two
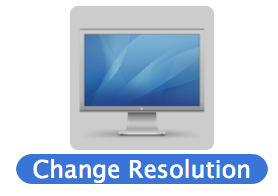
Double click the extracted application to launch it.


Step Three
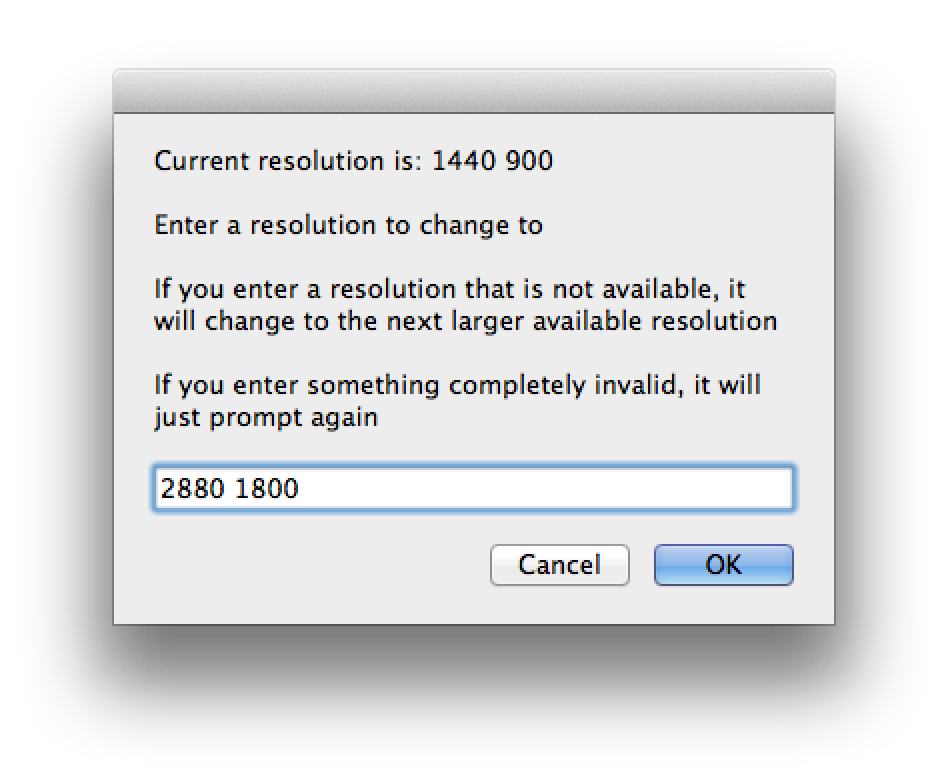
Input 2880 1800 into the entry field and click OK.


Step Four
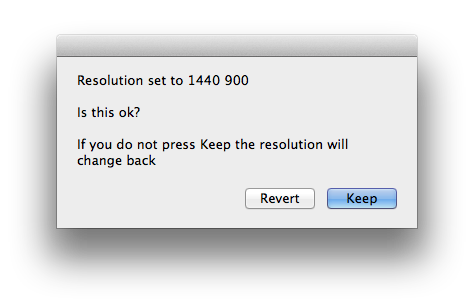
When prompted click the Keep button.


Step Five
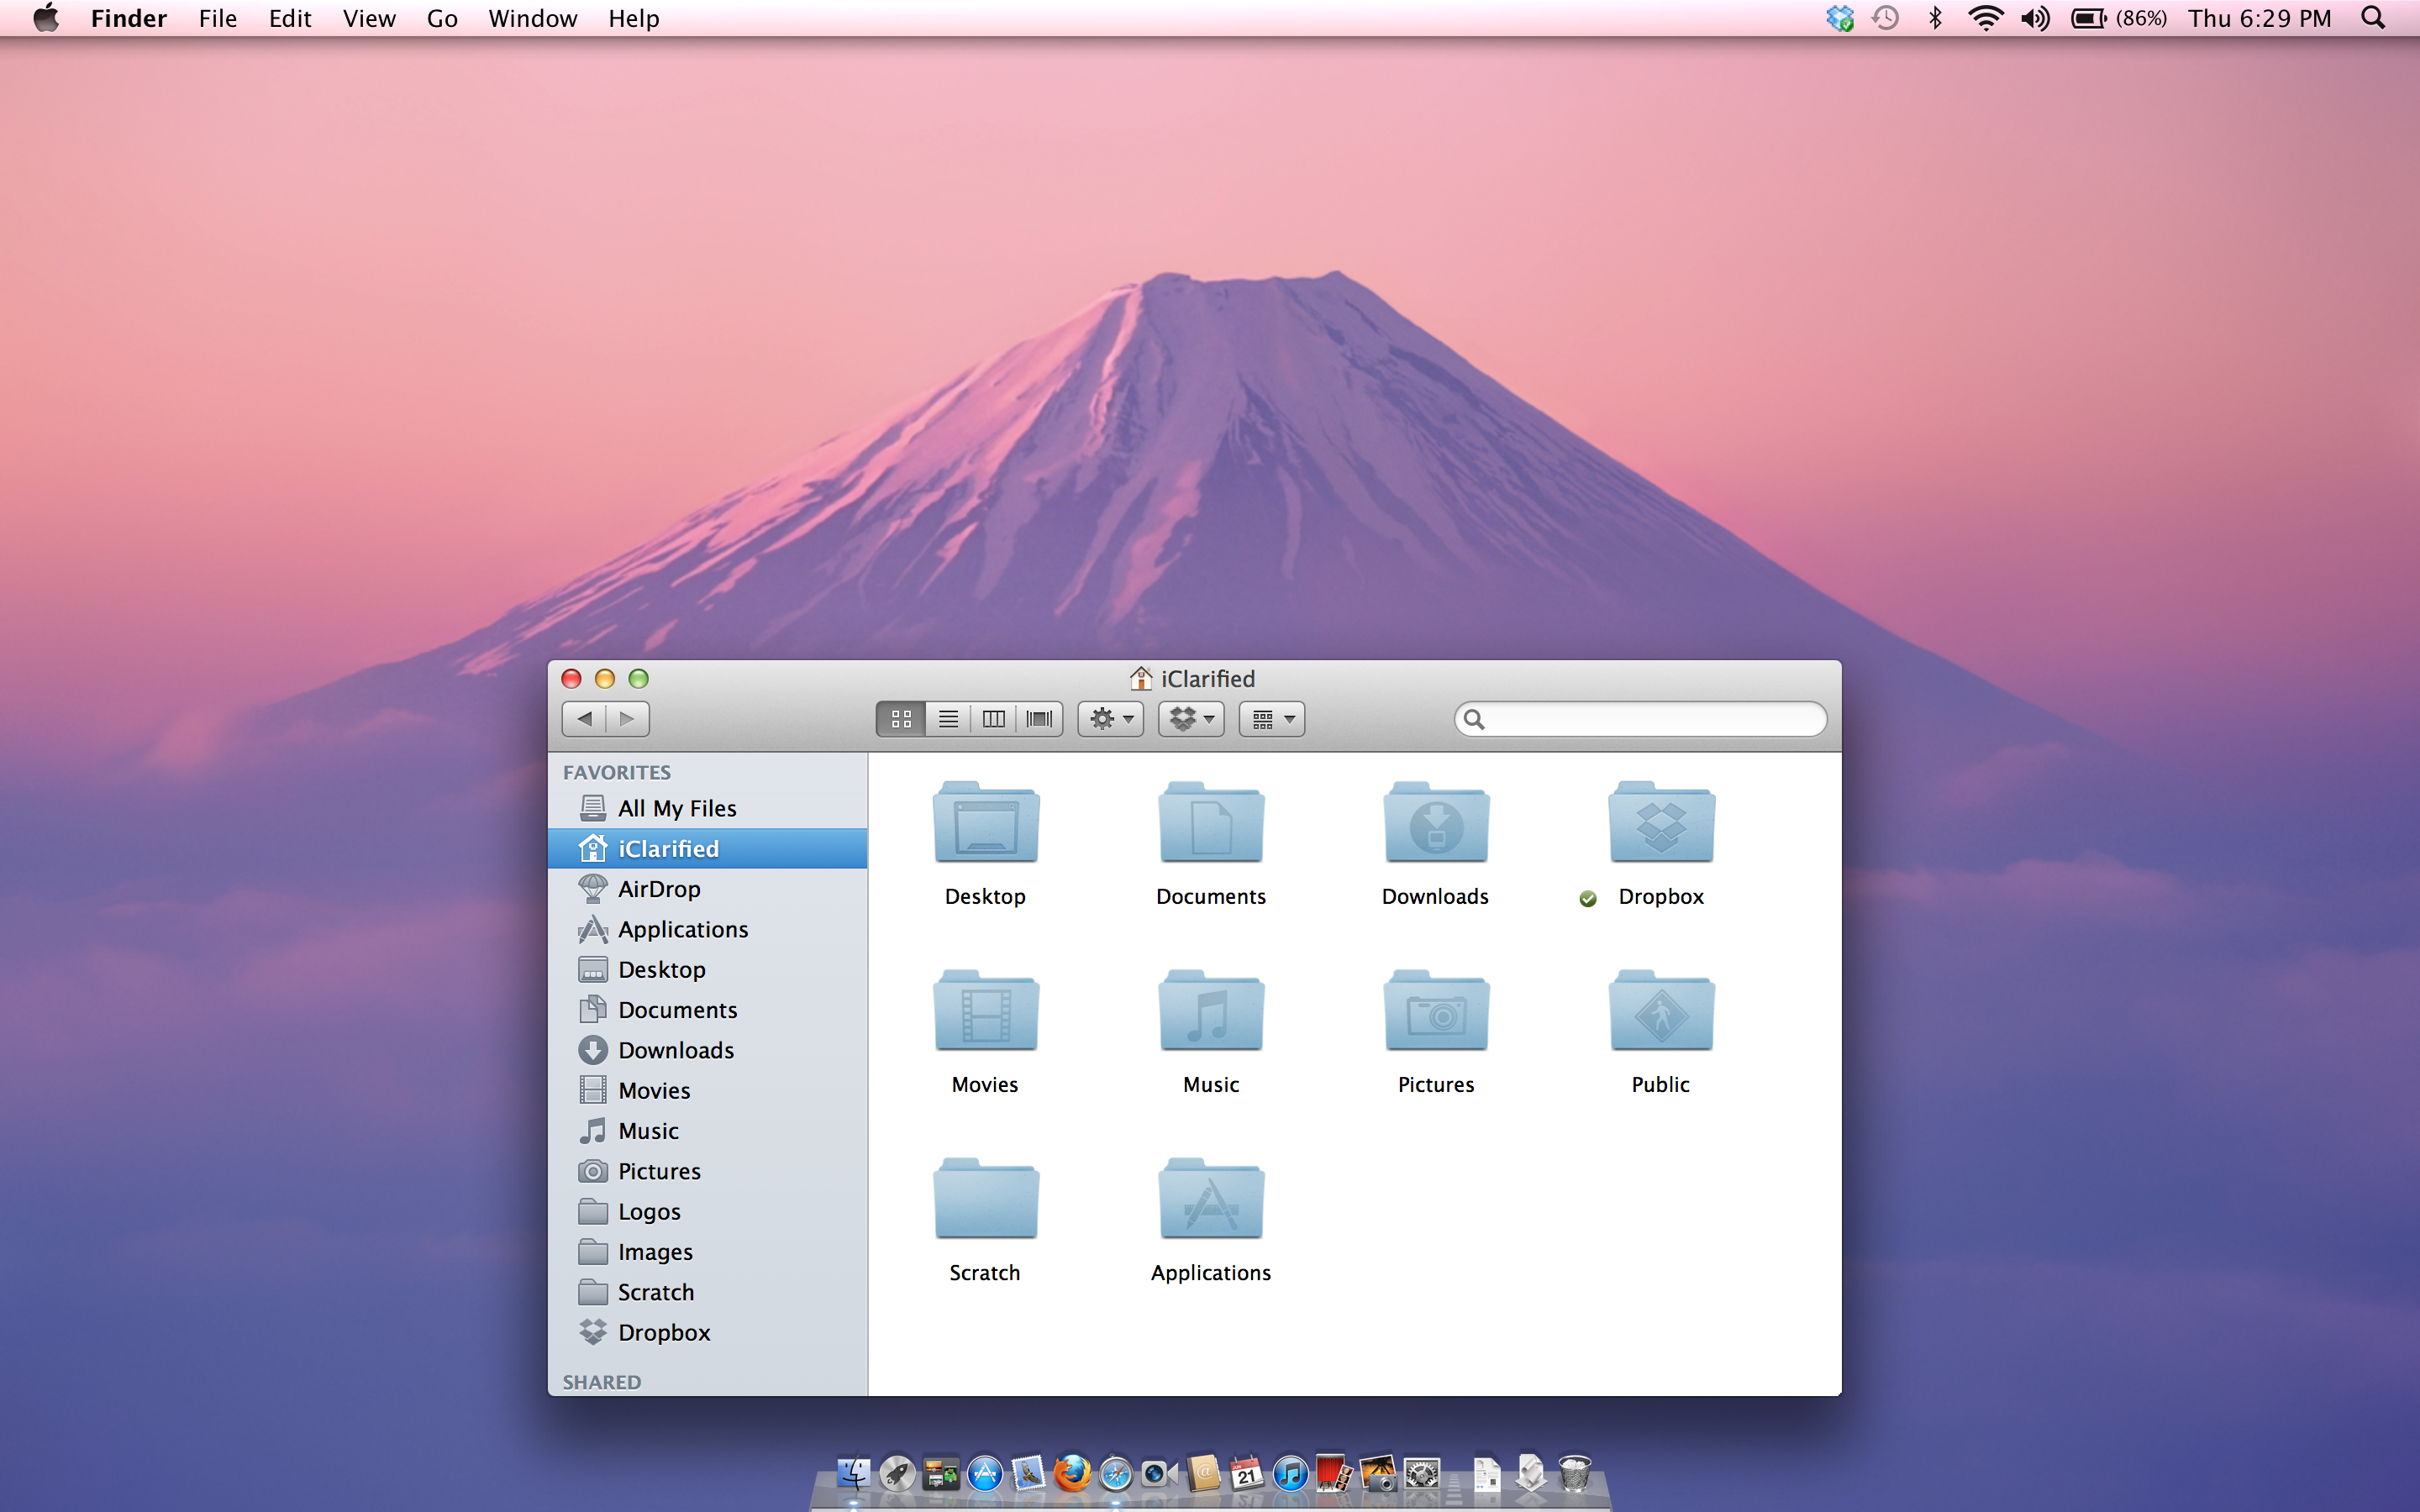
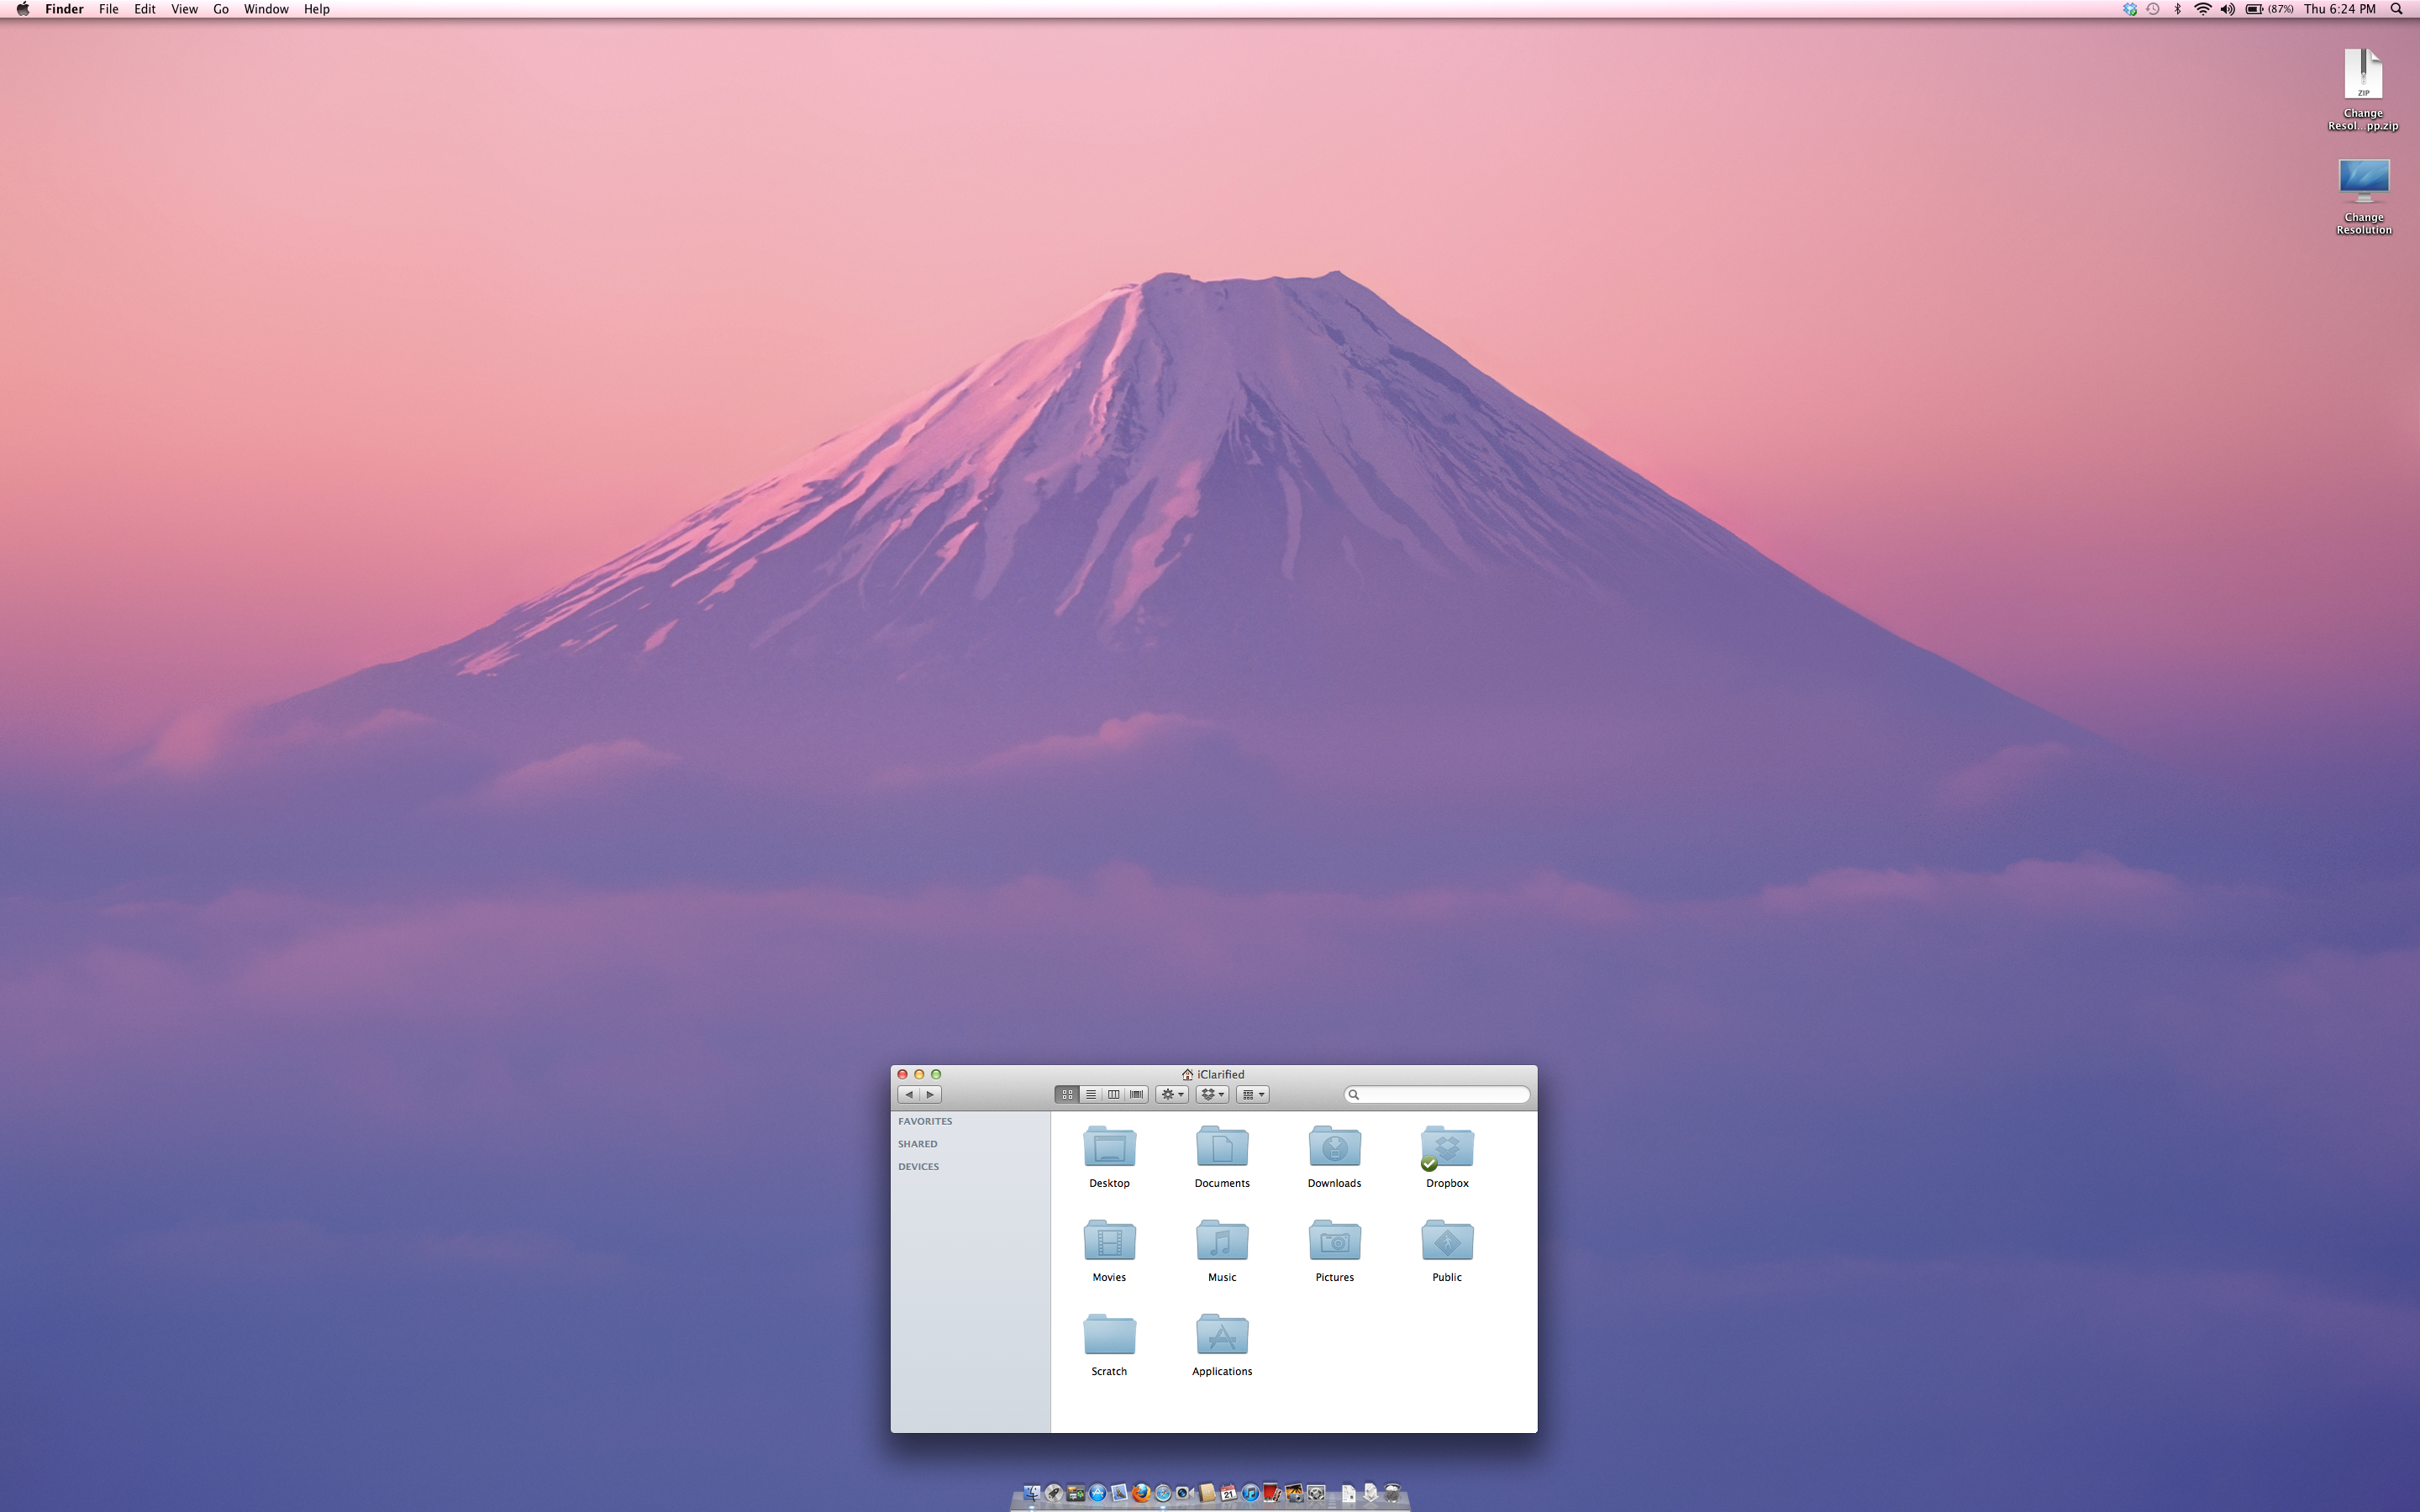
Your MacBook's display will now be set at an incredible 2880x1800 resolution. To revert these changes use the System Preferences:Display settings.

Before:


After:

Read More


How to Change the Default Save Location for OS X Screenshots

Source : Internet

These are instructions on how to change the default save location of OS X screenshots to a folder of your choice. By default Apple has screenshots save to your desktop.

Step One
Launch Terminal from the Applications:Utilities folder.


Step Two
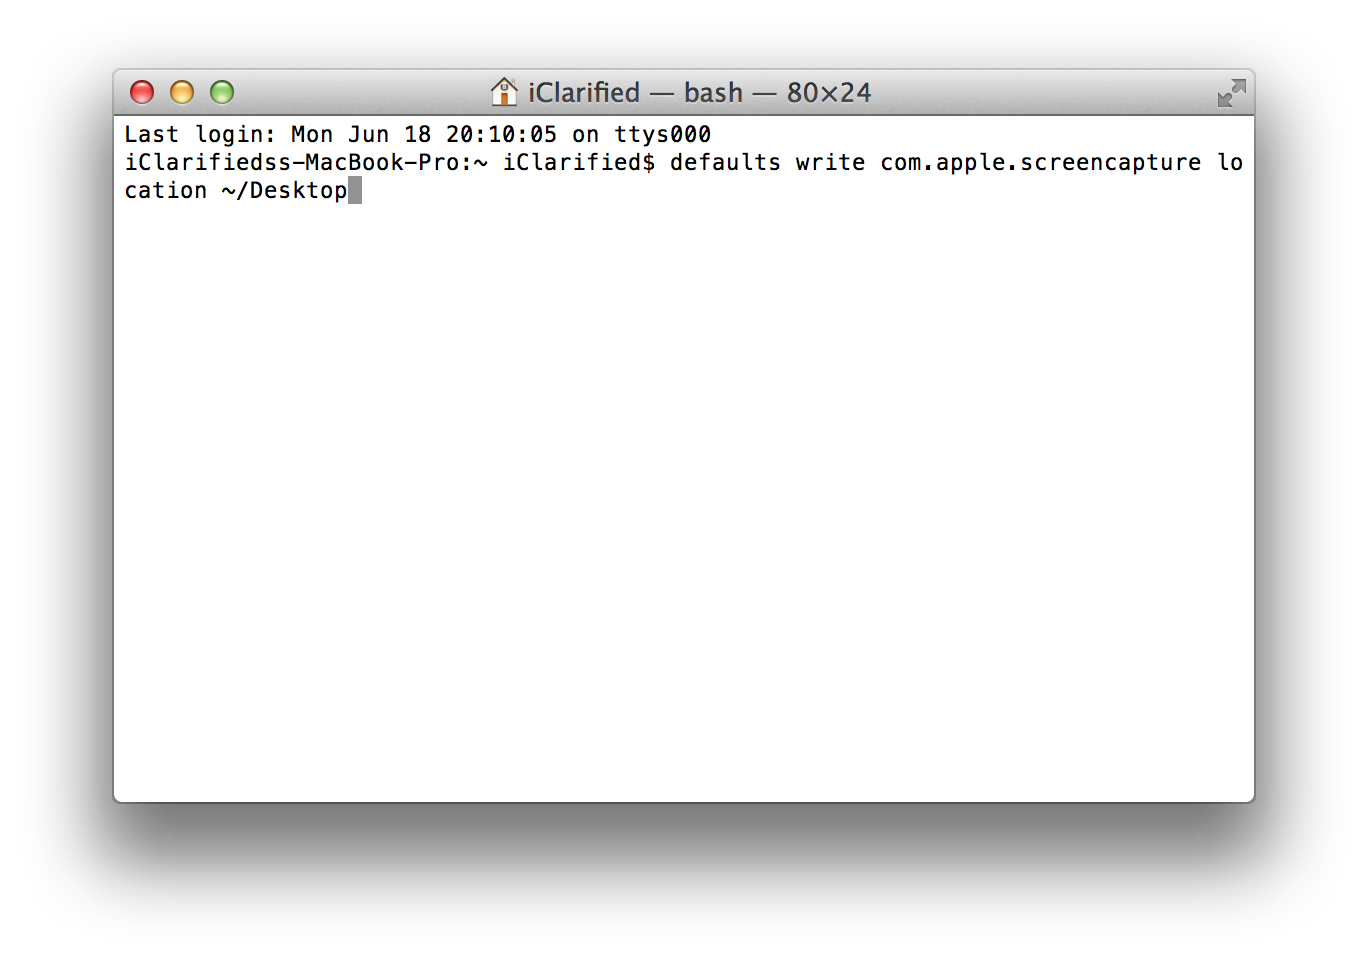
Input defaults write com.apple.screencapture location ~/Scratch into the Terminal window changing '~/Scratch' to a folder of your choice and then press Return.


Step Three
Input killall SystemUIServer into the Terminal window and press Return to make the changes immediate.


Undo
To undo these changes simply follow them again using this command to change the save location: defaults write com.apple.screencapture location ~/Desktop

Read More


How to Encrypt an External Hard Drive in Mac OS X Lion

Source : Internet

These are instructions on how to encrypt an external hard drive in Mac OS X Lion using the built-in FileVault 2. A drive formatted using this method may not be accessible in Snow Leopard or older OS X versions.


Step One
Connect your external hard drive to the computer and launch Disk Utility from the Applications:Utilities folder.


Step Two
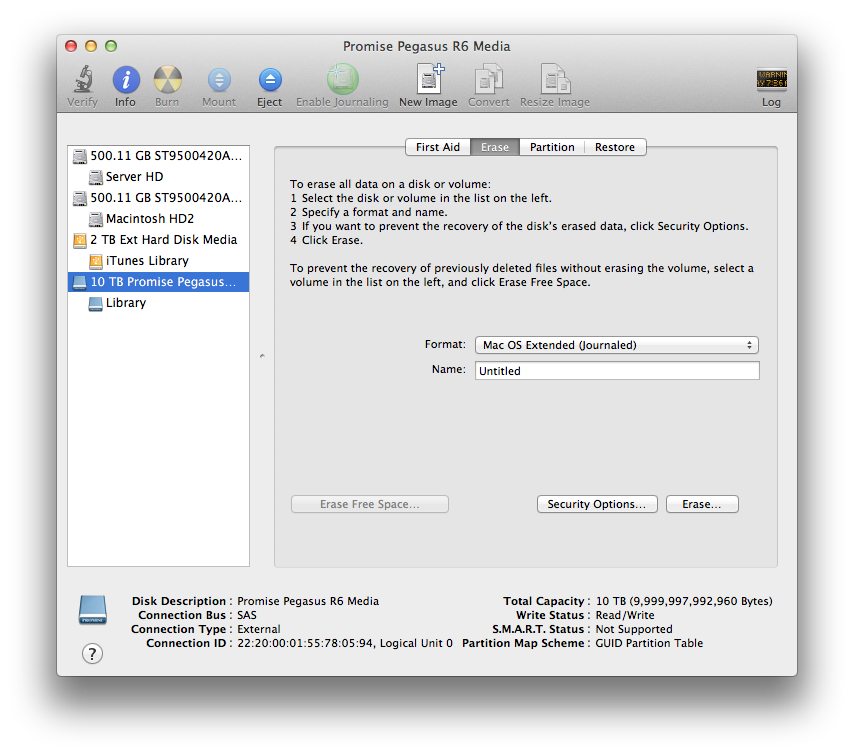
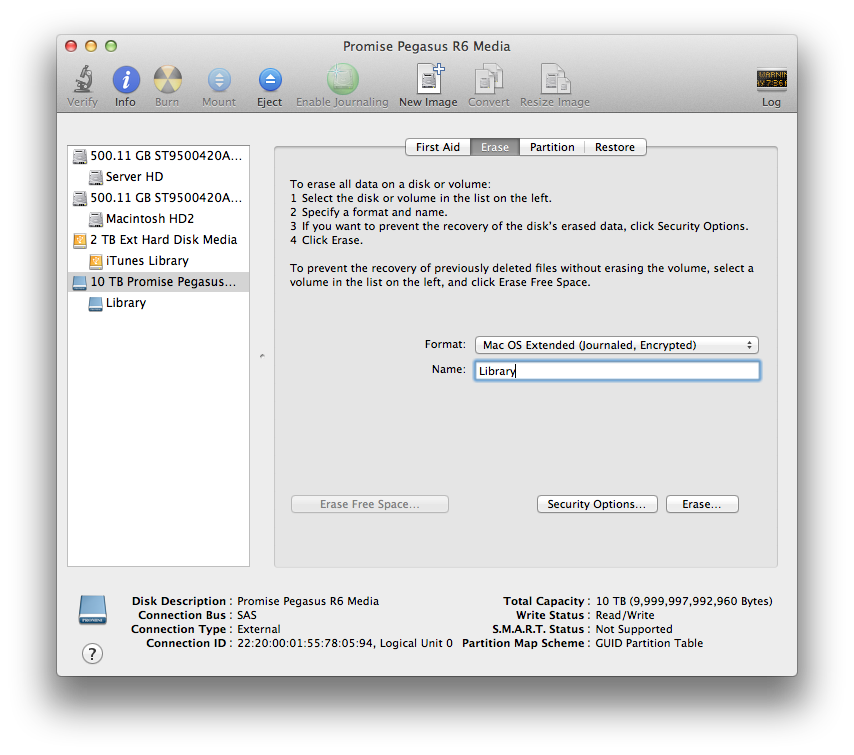
Select your device from the list on the left and click to display the Erase tab.


Step Three
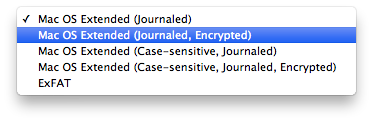
Select Mac OS Extended (Journaled, Encrypted) from the Format drop down.


Step Four
Enter a Name for the encrypted volume you want to create and click the Erase button.


**Remember this procedure will erase the contents of your drive. So make sure you backup for continuing...

Step Five
You will be asked to create a password for your new volume. Enter a strong password and click Erase.


Step Six
Your drive will now be erased and the new encrypted volume will be created.


Step Seven
Congratulations! You should now have an encrypted external hard drive. If you disconnect the drive you will need to input your password before the external hard drive can be mounted again.


Read More


How to Locate OS X Apps on Your Mac By Bundle ID

Source : Internet
These are simple instructions on how to find the location of Mac OS X applications by Bundle ID.


Step One
Launch Terminal from your Applications:Utilities folder.


Step Two
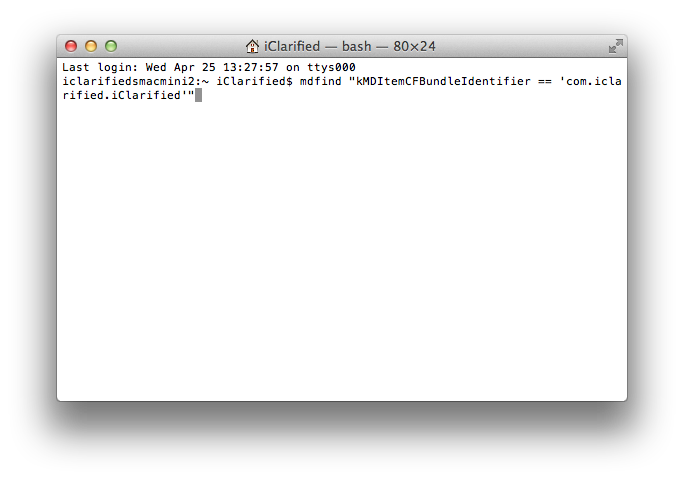
Input mdfind "kMDItemCFBundleIdentifier == 'com.bundle.id'" replacing com.bundle.id with the BundleID of the app you're searching for, and press Enter.


Step Three
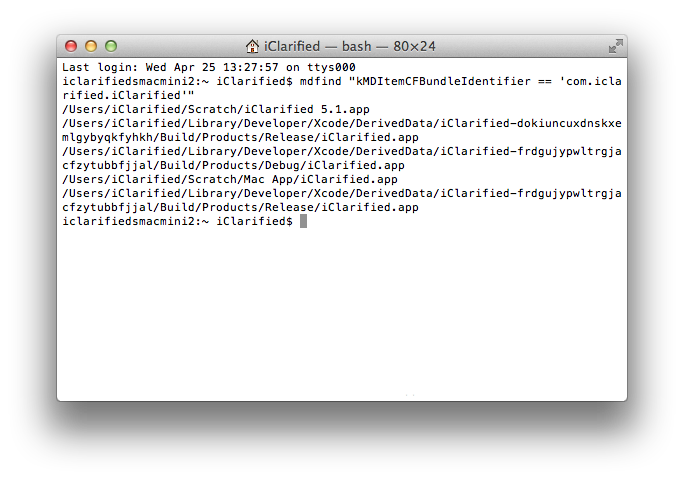
You'll now be shown the directory location of the app you were looking for. If you have multiple copies of the app on your system you'll be a shown a list of locations.
Read More


How to Convert H.264 MKV Files to MP4 Without Re-encoding (Mac) [Easier]

Source : Internet

These are instructions on how to convert H.264 MKV files to MP4 without re-encoding using MP4Tools for Mac.


Following this procedure will save you lots of time and prevent video quality degradation if you need video in mp4 format for playback through iTunes, the Apple TV, or your iOS device.

Step One
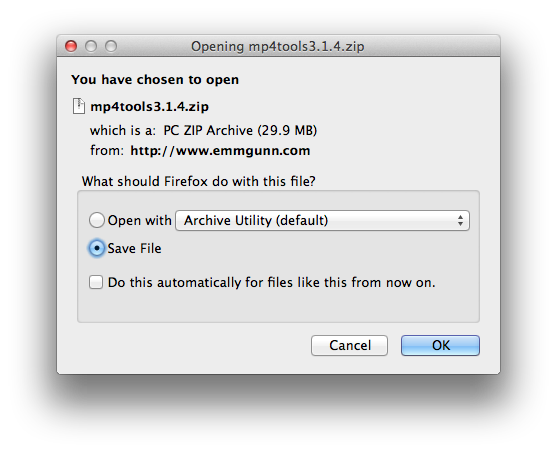
Download MP4Tools from here and copy the application to your Applications folder.


Step Two
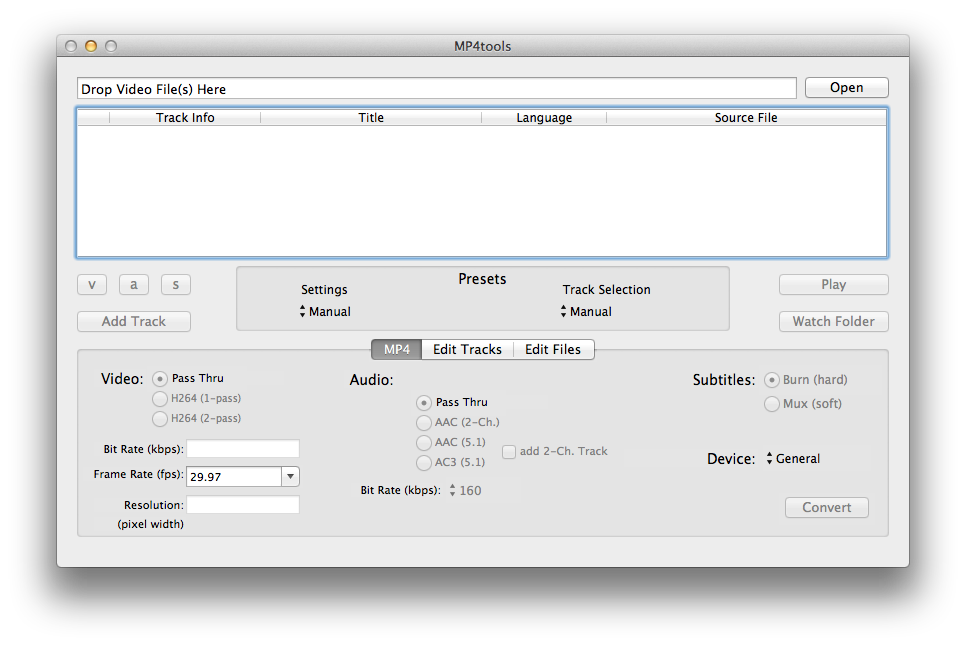
Launch MP4Tools from your Applications folder.


Step Three
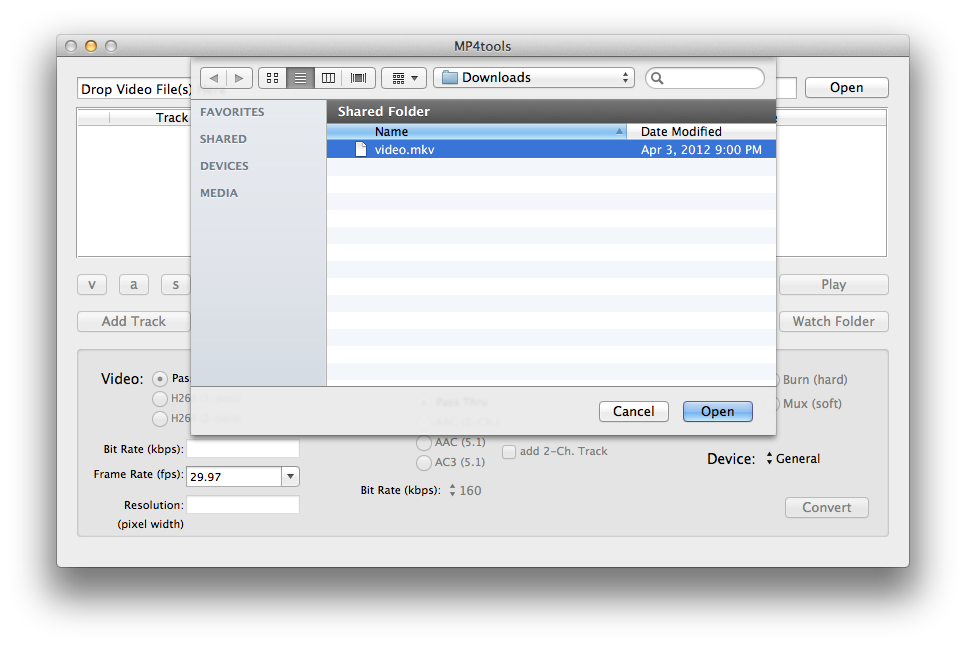
Click Open, select your mkv file, and click Open again.


Step Four
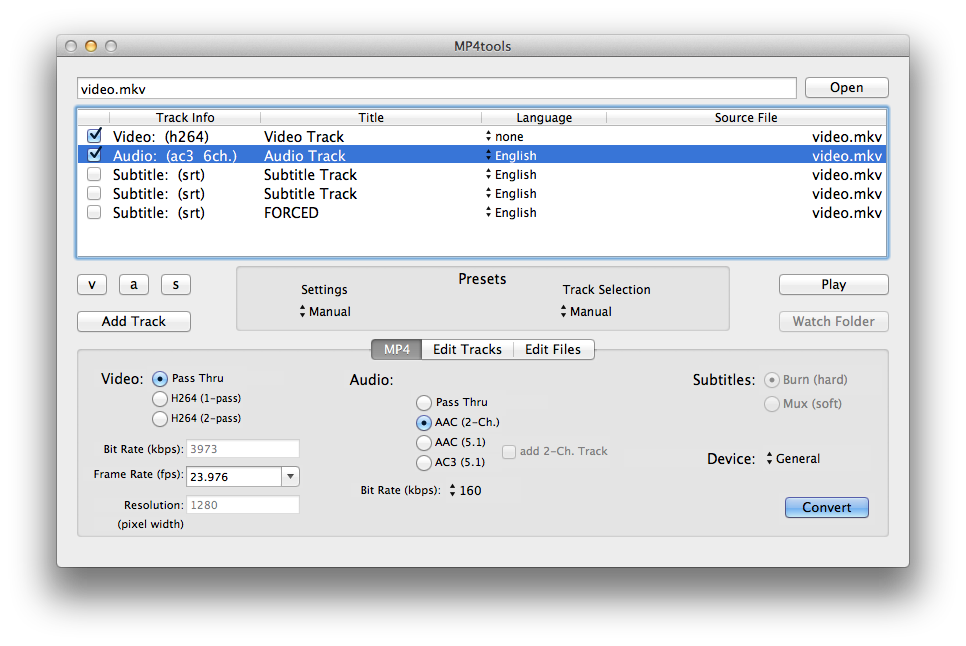
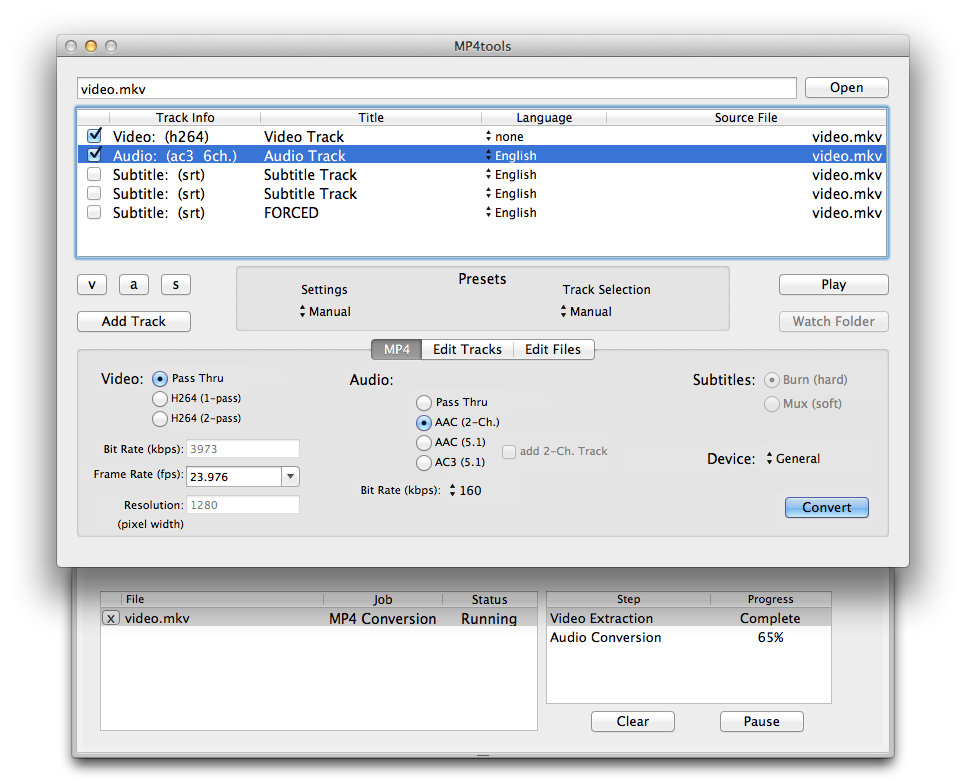
Ensure that your video and audio tracks are selected. If your video is H.264 you will not need to re-encode the video so select Pass Thru from the video section. If the audio is aac you will not need to re-encode the audio so you can select Pass Thru from the audio section. If it is NOT aac then select AAC from the audio section.


Step Five
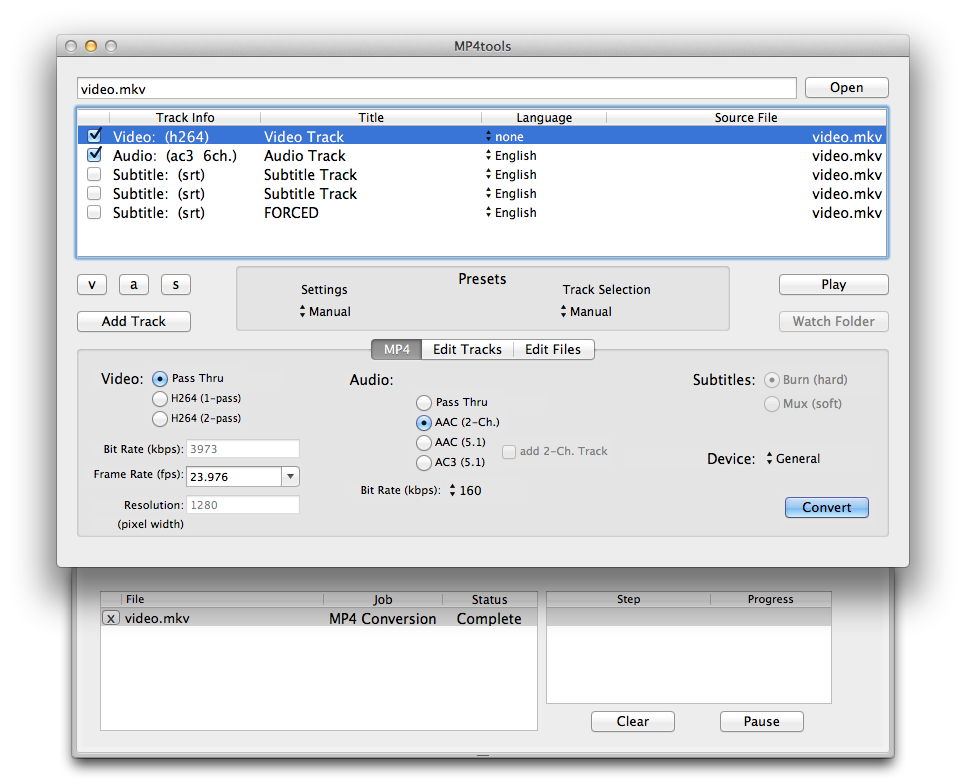
Click convert to begin creating your MP4 file.


Read More


How to Convert H.264 MKV Files to MP4 Without Re-encoding (Mac)

Source : Internet

These are instructions on how to convert H.264 MKV files to MP4 without re-encoding. 


Following this procedure will save you lots of time and prevent video quality degradation if you need video in mp4 format for playback through iTunes, the Apple TV, or on your iOS device.

***We have posted an easier version of this tutorial here, we suggest that most users follow that tutorial instead.***


IDENTIFY THE SOURCE VIDEO AND AUDIO
Before beginning lets get some details on the source video and audio.

Step One
Download and install VideoSpec to your Applications folder from here.

Step Two
Launch VideoSpec from your Applications folder.


Step Three
Click Select from the toolbar.


Step Four
Choose your .mkv file and click Open.


Step Five
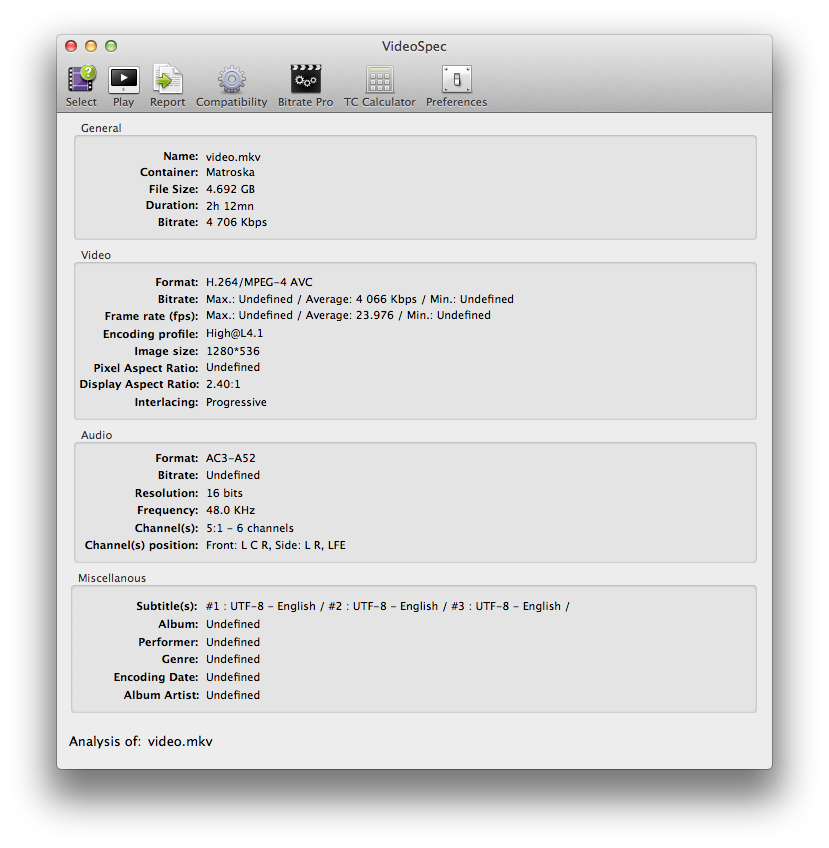
Make sure the video format is H.264 and take note of the Frame Rate (fps) and Audio Format.


Important: Make note of the Encoding Profile. Some older Apple devices only support the Main profile so if your video is High Profile this procedure may not work. The new Apple TV supports High Profile at Level 4.0; however, we have tested level 4.1 and it worked fine in all attempts. The iPhone and iPad support High Profile level 4.1.


EXTRACT VIDEO AND AUDIO FROM MKV
Demux (ie extract) the video and audio tracks from the MKV container format.

Step One
Download and install iMKVExtract from here to your applications folder.


Step Two
Launch iMKVExtract and click the Browse button to select your Matroska file.


Step Three
Select your mkv file and click the Choose button.


Step Four
Select the video and audio track for extraction. These are usually track one and track two.


Change the target folder if need be and click the Extract button.

Step Five
iMKVExtract will let you know when the extraction is complete.


CONVERT AUDIO TO AAC
If the audio track you extracted is NOT in AAC format than you will need to convert it. If it is in AAC format then you can skip this section.

Step One
You can use your favorite application to convert the audio or try Audio-Converter which can be downloaded from the Mac App Store here.

Step Two
Launch Audio-Converter from the Applications folder.


Step Three
Set the Convert To: dropdown to AAC then set the destination folder to the folder than contains the files we extracted earlier.


Step Four
Drop the audio file that was extracted from the mkv into Audio-Converter to begin conversion. Note: the audio files will likely be named audio2.ac3 or audio2.dts.


COMBINE VIDEO AND AUDIO INTO MP4 FILE
Mux the .h264 video and the .aac audio file into a mp4 file using MP4Box.

Step One
Download MP4Box from here and save it to the same folder as your extracted video and audio. Double click to extract the archive if need be.


Step Two
Open a new Terminal window from Applications:Utilities.


Step Three
Navigate to the folder your video and audio is located in.
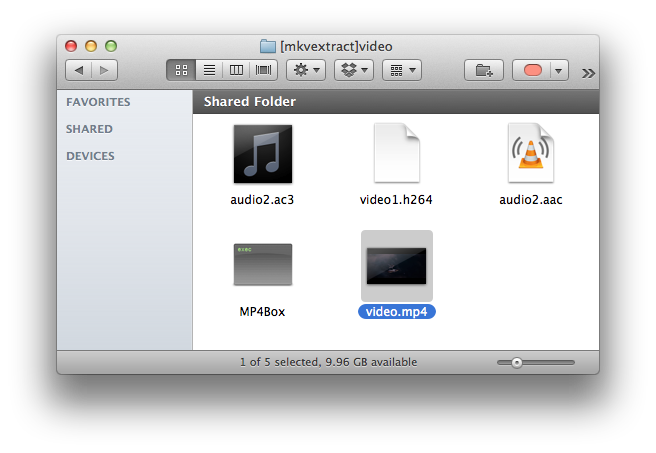
ie. cd ~/Desktop/[mkvextract]video


Step Four
Execute the command to create a MP4 video. Make sure to specify the frame rate we noted earlier or your audio will be out of sync. Also be sure to use the .aac audio file and not the original.

ie. ./MP4Box -fps 23.976 -add video1.h264 -add audio2.aac video.mp4


Step Five
MP4Box will now combine the video and audio tracks into a mp4 that can be added to iTunes!


Read More


How to Enable iCal's Debug Menu and Show More Than 7 Days in Week View

Source : Internet

These are instructions on how to enable iCal's debug menu to show more than seven days in week view and open multiple calendar windows at once.


Step One
Launch Terminal from your Applications:Utilities folder.


Step Two
Input the following command: defaults write com.apple.iCal IncludeDebugMenu 1


Step Three
Launch iCal or restart it if its already open.


Step Four
Notice there is a new debug menu with numerous options.


Step Five
One useful option can be found under Top Sekret which lets you change the Days In Week View to 14, 21, or 28.


Another useful option is the ability to open multiple iCal Calendar windows with Command+L.

Step Six
To disable the debug menu just open Terminal again and input defaults write com.apple.iCal IncludeDebugMenu 0


[via TUAW] [via Macgasm]

Read More


Return to top of page
Powered By Blogger | Design by Genesis Awesome | Blogger Template by Lord HTML